
We get a lot of questions about our studio setup, so I thought I’d compile the most frequently asked questions into one blog post. Everything we have set up came with a LOT of research, but lucky blog reader you get it all in one post!
What color are your walls? (And why are your walls gray?)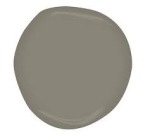 Benjamin Moore Sparrow AF-720, Flat. It’s a cool neutral gray, but tends slightly more towards green than some grays which can look blue. I think the slight green looks better with skintones. Depending on the light, the wall can look warmer or cooler. I loved the color in my 500 sq foot studio, and so I used the same color when we moved into our 2,000 sq ft studio.
Why not white walls? Before the 20th century, art studio walls were not white, they were dark! The invention of the “white cube” studio space is a 20th century idea. I believe it’s because in the 20th century the focus was moved off the subject and onto to the canvas. White walls put maximum light on the easel, but white walls bounce far too much light into shadows on the subject. Contemporary Classical Ateliers try to control the light of the subject and keep the shadows dark, so three-dimensional form is more clearly revealed.
Where do you get your plaster casts?
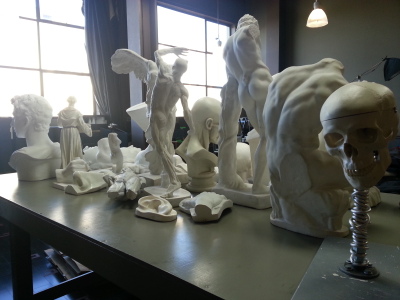
Giust Gallery is the best place I have found to buy plaster casts of antique and 19th century sculpture in the US. Good casts are very difficult to find because most museums no longer allow new moulds to be made of the collections, so the moulds are generally at least 100 years old and highly coveted. You can google search “Winged Victory” and find LOTS of plaster versions of the statue, but they are usually just inferior copies sculpted by modern artists. If you have ever drawn a particular cast and learned what it really looks like, you will cringe to see the terrible modern copies being sold as “casts”.
Where do you get human skulls and skeletons?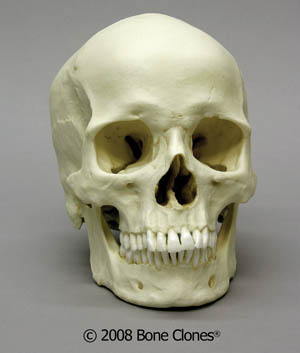 China and India rightly banned the export of human remains recently (to stop a very exploitative market), so in the last few years it has become extremely expensive and difficult to buy human skulls and skeletons. I bought one real human skull from The Bone Room in Berkeley California (a great place to visit, it’s like a Natural History museum where you can buy the exhibits) and I also bought a couple excellent reproductions from Bone Clones, which makes medical-grade casts of skulls and skeletons. Just as with casts, you can find cheap versions online, but a $60 plastic skull is so far from plausible human proportions as to be worthless for artistic study. Bone Clones is the only brand I have found to be good enough quality for artists.
How do you light your studio?
Our studio has north light windows, but in the evenings we light our studio with artificial daylight bulbs bright enough to be suitable for drawing and painting.
;)
Overhead Lighting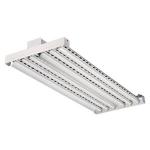 We did a lot of research before we installed our overhead lighting, and we have been really happy with the setup: Strong, white, full-spectrum bulbs that light up the room for our evening classes.
We were originally considering Kino Flo bulbs at about $22/bulb, but after looking at all the options we realized that Philips sells a tube fluorescent that has equally good ratings for $4 a bulb.
We wanted a Color Rendering Index (CRI) to be higher than 90, and the Philips bulbs were rated 92 CRI.
We wanted 6 bulbs in 4 housings, so buying 24 bulbs at only $4 each was a huge savings. These are the bulbs we bought:
Philips 40-Watt 4 ft. T12 Natural Supreme 5000K Linear Fluorescent Light Bulb
The other problem with Kino Flos is the housing fixtures for the bulbs are also really expensive. So instead, we mounted the Philips bulbs in these 6-bulb housings from Home Depot:
Lithonia Lighting Industrial 6-Light High Bay Hanging Fixture
The specs say the housings are for T8, 32 watt, but the T12, 40 watt Philips bulbs fit just fine with no heat increase.
In fact the lights generate no discernable heat, and no sound at all. I find the flicker and hum of bad florescents very distracting, so this was really important to me.
The housings do not come with plugs so we purchased a 14 gauge grounded extension cord and my husband Nowell joined the wires.
The hardest part was getting the lights hung from our 18 foot cement ceiling! After lots of hassle we finally found a hourly-rate handyman with a scaffold who could hang them from chains drilled into the ceiling, but that was after we rejected a $3000 installation-only bid from an electrician.
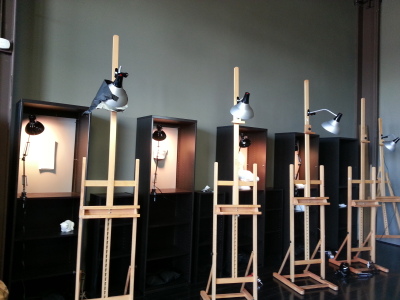
Easel Lighting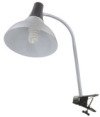 When more light is needed on an easel we attach a Daylight Easel Lamp from Dick Blick. It has by far the best designed clamp I have ever seen on a clamp light, and comes with an excellent daylight bulb.I recommend these often to students for their home studios.
Matte Black Cinefoil attached with gaff tape helps control the light so it does not spill onto the subject.
Lighting the Model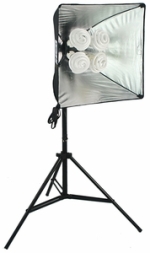 Finally, we needed a better setup for lighting the model. We have a set of theater Arii fresnel lights from Nowell’s filmmaking days, but those lights are warm in color, run hot enough to burn a bare hand, and are heavy and prone to tip their stand the second the sandbags are removed.
I asked around and got the excellent recommendation from Susan Lyon for the Tabletop Kühl Lites. We bought a set of 2 and we love them!
We have them mounted on a better quality c-stand so they can be mounted on a boom arm for greater flexibility over the model, but the stand they come with would work fine too.
Finally, sandbags are important to keep them from tipping on any stand. The shipping fees for a full sandbag are outrageous, so we buy the sandbags empty and fill them with sand bought from the local hardware store.
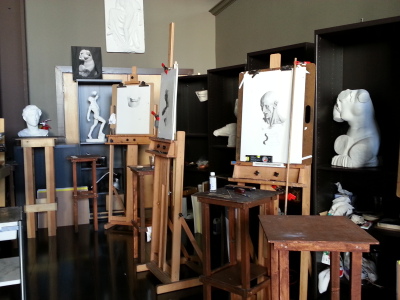
How do you set up your Cast Drawing Stations and Still Life Stands?
IKEA! For cast drawing, each student gets their own dedicated Ikea BESTA Shelf 401.021.29, which they light with daylight or with a clamplight.
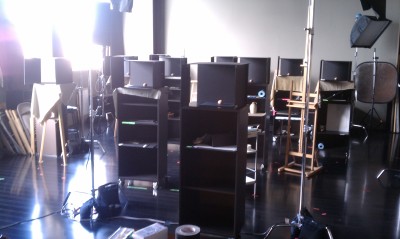 For my still life classes we have Ikea BESTA Shelf101.021.35 on castor wheels which we roll out for each still life class, and we keep the still life setups on the shelves below for safe storage between classes. These are a good height for still life and I recommend my students buy these for their home studios. I make shadow boxes from black foam core and gaff tape which are set on top the stands.
Setting up our teaching studio has been an enormous labor of love, and we have worked hard to get everything just right for our students and instructors.
I feel grateful to all the artist studios and ateliers I have visited to get ideas for mine, and grateful to be an artist in an era where this kind of information is freely exchanged between artists.
We don’t get any compensation for endorsing the products we list here, it’s just honestly what we use and like, so if you feel so inclined, buy a video to say thanks for the free info!