Search this Blog
Sadie's Blogs and Website

For posts 2006-2010
please visit
sadievaleri.blogspot.com

Sadie’s current site is at
SadieValeriAtelier.com

UPDATE February 1, 2021

I have recently discovered that unfortunately this Squarespace blog has failed to maintain most the images for older posts on this blog. Luckily, the original Blogger version is still live at sadievaleri.blogspot.com and all the posts and images from 2006-2010 are still visible there.

For my current artwork, teaching, and blog please visit Sadie Valeri Atelier.


Saturday
Jan072012

New Studio for the New Year

I am very pleased to announce that I am moving to a larger studio! 

We have been preparing the space for the last couple of weeks, and now I can finally share a sneak peek.

The new studio is 1800 square feet, with 18 foot ceilings and a wall of north light windows. We have painted the walls a classic “atelier gray”, and installed brand new glossy black flooring. There is a separate small space for my own painting studio, and the rest of the space is wide open for classes and workshops.

The studio is just a half mile from my old space. It is located on Bryant Street, just north of 16th street, near the the Protrero shopping center.

With the larger space, we are now offering even more classes and workshops:

Non-Instructed Figure Model Sessions
Tuesday and Thursday evenings
Monday and Wednesday daytime
To see the full schedule and register for the first round of sessions beginning the week of February 6, please visit:
http://www.sadievaleri.com/model-sessions/

Drawing and Painting Classes
There are still a few spots left in our Winter/Spring schedule of classes, see all upcoming classes here: http://www.sadievaleri.com/classes/

Advanced Open Studio
For artists who have completed group painting or drawing classes and wish to practice their skills with Sadie’s help and instruction, we are offering Advanced Open Studio on Sundays.
For more information visit:
http://www.sadievaleri.com/advanced-open-studio/

Easel Assembly / Pizza Party / Champagne Toast
We would like to invite our local studio friends to a sneak previw of the new digs! We invite anyone to drop by the new space on Friday, January 13th4pm-9pm.
If you are feeling handy, we would love your help assembling our fresh batch of fancy new easels. And even if you are not particulary adept with assembly, please stop by for a slice of pizza and a glass of champagne anyway!
(Note: Those who arrive on the early side can get a glimpse of our lovely north light before sunset!)
Please RSVP to info@sadievaleri.com and we will send you the address.

I would like to thank everyone who took classes and workshops from me in the last few years. It is through your support and dedication to Realism that this expansion of the Sadie Valeri Atelier is even possible.

I hope you will enjoy the new space in 2012!

-Sadie


Saturday
Aug132011

Flower Alla Prima Oil Sketches

Orange Dahlias, 9x9, oil on linen

Ever since I got a lesson from Michael Klein in direct-method flower painting a couple months ago I’ve wanted to try it again, and once I got home from France I finally had a chance.

Tiny Rose Arrangement, 8x10, oil on linen

The landscape painting also was a good warm-up for direct method painting in the studio. I usually paint Indirect, or Flemish method - where I work in many layers, allowing each layer to dry completely before applying more paint.

Scattered Flowers, 14x18, oil on linen

With Direct method, wet paint is layered over wet paint, and most of the strokes of paint you make will be visible in the final piece. The goal is to get the correct hue, value, chroma, and edge down in each stroke, without adjusting.

For these paintings I am using New Traditions L600 lead-primed linen which comes in big rolls you can cut to the size you need.

I started each painting with an underpainting just using Burnt Umber to work out the composition, basic values, and placement of the objects.

I used Rosemary brushes which I like a lot, they are totally different than the more controlled Robert Simmons white sable brushes I use for Indirect painting.

Red Lilies, 12x16, oil on linen

All of these paintings were done alla prima, meaning in a single day’s painting session. Direct painting can be done in one session or over many days or weeks, but each stroke is painted as it is meant to be seen in the final painting.

And now I’m back to my regular Indirect method, as I have been working the last few days on a preparatory drawing for a new piece which will take me about a month to complete. I won’t have much time to paint in the next few weeks, between teaching my workshop, various short travels, and attending Weekend with the Masters, but it’s been fun to start at least.


Thursday
Aug112011

40 in France

This year I turned 40, and to celebrate I planned a month of landscape painting in France, something I have wanted to do since I first visited France at age 16. I chose the Dordogne region in the south-west of France because of it’s reputation for beautiful, varied landscape: rolling green hills, cliff towns, winding rivers, forests, and most important…… castles!!

Chateau Feyrac, 9x12, oil on paper

We rented a house in the gorgeous little town of Beynac-et-Cazenac, which is a network of steep cobblestoned streets and adorable stone houses crowned with a 12th century castle at the top.

Veiw of Chateau Beynac from the Dordogne, 9x12, oil in paper

I decided to paint on paper for a portable, lightweight material perfect for plein air sketches. Before the trip I cut sheets of Rives BFK printing paper in various tones into standard sizes, mostly 5x7 and 9x12. Then I primed the paper with 2 coats of Golden Acrylic Medium. Each day I just taped a piece of paper to a foamcore backing and mounted it on my Open Box M setup. It was a wonderful surface to paint on!

See my previous blog post post describing my plein air setup

As it turned out, it ended up raining for 2 of the 4 weeks we were in Beynac, so I did not get to paint nearly as much as I’d planned. But instead we hung out with visiting friends and family who shared our rental house and rented other houses in the same village.

Chateau Castelnaud, 9x12, oil on paperAt the very end of the trip the rain cleared and I got one last painting day in. I found a beautiful quiet spot next to a field of corn with a view of neighboring Chateau Castelnaud. The day was warm and lazy, and the #1 BEST thing about painting in France is….. NO MOSQUITOS!!!!

To see all of my paintings from France this summer:

Picasa Google+ Album: France Plein Air 2011

Facebook Album: France Plein Air 2011

See my photos of Paris, Beynac, and the Dirdgne region of France:

Facebook Album: Artsy Shots of France 2011

Saturday
Jul022011

Featured in American Painting Video Magazine

Last month American Painting Video Magazine visited me in my San Francisco studio and interviewed me for their Summer issue, just released yesterday! You can hear an interview with me in my studio and also in-process footage of my newest painting, Undersea.

Download Volume 2, Summer issue here!


Undersea
15.75 x 20 inches, oil on panel 

About the painting:

Walking through San Francisco’s historic North Beach neighborhood, I stopped to look at a shop window full of collectibles and curiosities, and caught sight of a large, barnacle-encrusted bottle. I went in and spoke to the shop owner, who said he he had dredged up the bottle from the bottom of the San Francisco Bay while diving.

We struck a deal, I walked home with my treasure, and the next day the barnacle bottle was perched on my still life shelf, quietly demanding to be painted.

Over the next few days an arrangement evolved which promised to consume my studio time for weeks: A collection of salvaged treasures seemingly dredged up from the bottom of the sea. 

In this painting I have grouped objects with a variety of edges and textures: The waxed paper nearly disappears as it melts into the shadows of the background, while the spiny contours of the crab claw strike a dramatic silhouette. The soft cool highlights of the glass bottle must compete with the warm, sharp whites of the barnacle shells.

To capture this variety requires the most subtle decisions about color, value, and edge control. It takes many layers of thin oil paint to create the final result, as many as seven to ten layers in the most complicated areas.

Friday
Jun102011

Study of Torrey: Block-In

NEW CLASS: 

Due to high demand I am now offering an additional Figure Drawing Class this fall:

6 Saturdays 12pm-4pm 
September 17, 24
October 1, 8, 15, 22

Sign up for Figure Drawing Fall 2011 here


This is a “quick” three-hour study I did last night in our Thursday evening model session. This will only be a 2-session pose, so I wanted to get as far as possible so next week I can focus on modeling form.

I took photos of the whole process of blocking in the figure:

I started just marking the top and bottom, and left and right, to get the whole positioned well on the page.

Then I took a mid-point measurement vertically. Since this particular pose is almost as wide as it is tall, I also took a horizontal mid-point measurement. For both marks, I make a visual note of where on the model the exact halfway points hit. 

I found during the process that I had initially over-estimated the width of the pose. I had a choice: I could increase the height, or decrease the width to bring the figure into proportion. I decided, based on the placement on the page, to make the figure smaller not larger, and so I brought both sides in. I was sure to bring both side in equally, so the horizontal mid-point was not disturbed.

If I’d needed to bring one side in more than the other, I would have re-measured the midpoint.

Once the major proportions started working, I could move forward and start refining the contour.

Refining the contours requires keeping in mind the principles of oragnic form, so avoid superimposing symbolic and generalized shapes of the optical realisty. I am always looking for tapering spiral wedges of form. Nothing is parallel.

Finally I was ready to start some shading, at least blocking in the shadow side of the figure. Blocking in the true shadow - the form not hit by direct rays of light from the primary lightsource - is a good way to clarify light from shadow, and keep all future value decisions in context. Everything in the light will be high value, everything in shadow will be low value, and the two will not be confused.

This stage makes the figure look very graphical and flat, and next week I start modeling I will be “turning the form” by shading from shadow up to light, which will make the form round again.

NEW CLASS: 
Due to high demand I am now offering an additional Figure Drawing Class this fall:

6 Saturdays 12pm-4pm 
September 17, 24
October 1, 8, 15, 22

Sign up for Figure Drawing Fall 2011 here

Wednesday
Apr272011

Study of Wendell

Study of Wendell, 18”x24”, charcoal, graphite, and white chalk on gray paperWe have just finished a 4-week, 20-hour pose by the amazing Wendell Wilson who was an excellent, rock-steady model for us.

This pose was for the Monday non-instructed Model Session. The sessions will pause for the summer starting in late June, but will be starting back up in September, please join us!

Also, we just had ONE spot become available in my Drawing Fundamentals class, 6 Sundays beginning May 15. The spots tend to fill quickly and I won’t be offering this class again until 2012, so sign up now:

Drawing Fundamentals class details and registration info are here

Tuesday
Apr262011

Varnish: Tips and Techniques

I have recently polled all my artist friends and researched extensively online to find the best method for getting a perfect finishing varnish on my oil paintings. After lots of practice, I finally have a method that gets great results every time…. Well, almost every time. Varnish is a notoriously tricky procedure!

What is Varnish?

Varnish is the final clear finishing coat applied over a “dry” oil painting. Varnishing seals the surface of the painting, protecting it from dust and dirt build-up. It also restores an all-over sheen to the whole painting, deepening shadows and restoring colors that may have gone matte as the paint dried.

How “Dry” is Dry?

Traditionally, artists waited 6 months to a year before varnishing. And that’s for thin paint! Thick globs of oil paint may actually take many years to dry completely. However, if you are actively showing or selling your work, or working on commission, this is highly impractical to nearly impossible. So, many artists varnish when the painting is “dry to the touch”. There is danger of cracking however, especially if the paint is thick and you are working on flexible canvas.

What Kind of Varnish?

Damar is the traditional varnish used by artists, made from tree resin. However, it is known to yellow with age, and it is also very brittle. Gamblin, manufacturer of paints and mediums, has developed a synthetic-resin varnish called GamVar that has been designed to remain transparent, and also is less brittle. In fact, GamVar says you can apply their varnish when the painting is dry to the touch. Apparently GamVar allows the painting to continue to dry underneath the varnish. Personally, I find GamVar significantly easier to apply, as it stays “brushable” for some time, and does not get tacky within seconds like Damar. So, now I never use Damar, and I only use GamVar.

Removing Varnish

Varnish is made to be removable by anyone in the future cleaning or restoring your painting. It is designed to dissolve easily with odorless mineral spirits (OMS). It’s hard to imagine rubbing OMS or turps on your oil painting, but keep in mind, dry oil paint has a very strong film and won’t simply wipe away with gentle swipes of OMS. So the good news is, if you mess up your varnish, it’s easy to remove and re-apply.

You will need:

  • GamVar Varnish
  • Sponge brush (Buy several, they are cheap)
  • Small shallow dish (larger for a large painting)
  • Small soft paintbrush, like a #1 sable filbert
  • Low-lint cloth
    (There is no such thing as “lint-free” but do the best you can. I use floursack-style dishcloths, although I recently discovered soft auto-cloths, almost like baby diapers, which I am going to try next.) 

Lint is your Enemy

Lint (and dust) will conspire to flock to your painting in massive unforeseen hoards. The largest airborne bits of debris you have every seen will suddenly appear to hover above your freshly varnished painting in a great, slow mating dance. Your job is to keep lint off your painting, and off everything else that might come in contact with your painting.

Prep

Never varnish the day you ship, frame, or deliver a painting! Give yourself a few days of extra time, both for the sake of the painting, and for your own sanity.

Varnishing with GamVar for the first time takes a bit of advance planning, because it comes in a box with 2 ingredients you must mix together in a jar 8 hours before you use it. The directions say to shake the jar every hour for 8 hours, but I have found this to be impossible - who could do that? So I just shake the jar once or twice over 8 hours, as I think of it, and it has always worked fine.

Once the GamVar is ready to use, take out your dry-to-touch painting and inspect the surface. Use tack-cloth or adhesive tape to remove any dust or lint that has accumulated. If there is a lot, you may want to wipe down the surface gently with a clean, low-lint cloth dipped in a bit of OMS.

Next, set your painting on an easel and shine a lamp on the painting for a good 30 minutes (don’t lie the painting down flat or it will just accumulate more dust). This will evaporate any moisture on the surface. If there is moisture on the surface, the varnish will “bloom” - a horrifying phenomenon, where you may think you have achieved a perfect varnish finish, only to find that within a few hours that the surface has developed a opaque white haze. Don’t let the painting get too hot, but it should warm a bit under the lamp.

Ready, set…. VARNISH


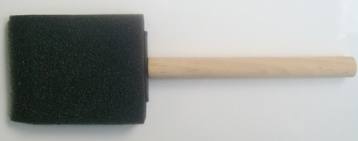
When you ready to apply the varnish, use SPONGE brushes. They are cheap, they don’t leave any stray hairs behind, and best of all you can just throw them away when you are done. I keep a batch of fresh my new ones in a plastic ziplock bag, so they don’t gather dust before use.

Pour a very small amount of GamVar into a clean, lint-free dish. It’s easier to dip the brush in a shallow dish, and also you won’t be contaminating your nice clean varnish jar with the inevitable dust or debris on your brush.

Dip the tip of the sponge brush in the GamVar, and then brush on a thin coat over the painting, using long, horizontal strokes to cover the entire surface. Then, blot (don’t rub) the brush on a clean, low-lint cloth.

Brush again with the slightly dry brush with strokes perpendicular to the first ones. Blot your brush on the towel again.

Repeat over and over, brushing and blotting, in perpendicular strokes, until the surface starts to tack up the tiniest bit, and “grab” the brush. 

This is reducing the glossy shine of the varnish, which can make the painting look too wet, and will make it too shiny, especially under bright gallery lighting.

Waiter, There’s a Fly in my Soup!

What to do when you get lint in your varnish: Use the small #1 filbert to carefully “back brush” and lift the lint out with one swift flick, and wipe on the cloth. If you don’t dig around too much, the varnish should “heal” and there should be no sign you messed with it.

The Inevitable Do-Over

At some point everone has to re-do a varnish job. If you have lots of lint, or bloom, or if the surface was touched or damaged, you’ll have to remove the varnish. To remove, dip your clean lint-free cloth in odorless mineral spirits, and gently wipe (or even roll) the cloth on your painting. Be careful not to damage the painting, but keep in mind, it’s probably more resilient than you think. Dry paint film is pretty strong. Wipe until it seems like all the varnish is gone. If you are not sure, wait a few minutes for the OMS to evaporate, and then look for glossy areas. Start all over again, starting with removing any dust or lint.

Varnishing a smooth painting

My paintings have a pretty smooth surface, which adds another issue to varnishing: Beading up. Sometimes the varnish immediately beads up just like water on a new car. This is because the surface is so smooth that the varnish has nothing to “grab”. You need to get some tooth in your surface. Wipe off the wet varnish with a cloth dipped in OMS. Then brush on a generous coat of OMS, and keep brushing until there is no longer any beading up. You may want to let the painting sit for a while, to let the OMS “bite” into the surface.

Be gentle, don’t rub hard, and the painting should be fine. When a coat of OMS does not bead up, the varnish won’t either. Put your painting under a lamp to evaporate the OMS, and then go ahead and varnish. Now I always brush on a coat of OMS before applying the varnish, to test for beading before I ever try to apply the varnish. NOTE: use one brush for OMS and a different brush for varnish. You don’t want to dilute the varnish with the OMS left on the brush.

Varnishing is tricky, and it’s always a good idea to practice on a small painting you don’t care much about before varnishing your masterpiece.

Good luck! If you have other tips or suggestions, feel free to leave them in the comments. 


Wednesday
Apr202011

From the Hudson to the Dordogne

A view of the Dordogne River in France

In Summer of 2009 I was accepted into the Hudson River Fellowship started by Jacob Collins. I blogged during the month-long trip, posting all of my plein air sketches and paintings as we learned to study the landscape as the pre-Impressionist painters of the 19th century did: With careful, detailed contour drawings of foreground elements, and precise color analysis of the landscape.

This summer I’ll be spending the month of July with my husband in the Dordogne region of south west rural France,where we have rented a house and plan to set up a home base. I’ll be doing landscape study using the same Hudson River School methods and techniques to draw and paint the medieval villages, castles, and rolling countryside of this historic region.

I’ll be posting everything to my blog, and hope you’ll follow along with my plein air adventure! If you’d like to be notified the moment I post new artwork during my trip you can sign up for my mailing list by entering your email address in the column to the right of this post.

Tuesday
Apr052011

Back Study of Eric

Back Study of Eric
14 x 17 inches, graphite on paper
This drawing was done over 4 sessions with the model, about 20 hours. It was a great opportunity to study the forms of the upper back.

OPEN STUDIO

My studio will be open to the public for Mission Open Studios, April 16th and 17th.
Since I teach a painting class on Saturday, my open hours will be limited to:

Saturday April 16th, 4pm-6pm
Sunday April 17th, 11am-6pm

Please enter around the corner at 2111 Mission St, where there will be a doorman to open the building for you. Once inside there will be a map to all the open studios in the building.

Download a map of all the Mission open studios
My studio is part of the “Blue Studios” marked on the map at 16th and Mission.


Tuesday
Apr052011

Oil Sketch of Mary

Oil Sketch of Mary (unfinished)
14 x 17 inches, oil on mylar drafting film

Mylar is a new material I tried out as as support for an oil sketch (I use a brand called Dura-lar). Mylar is a frosted drafting film and I’d read online that it is an excellent material for oil sketches. The surface is smooth but toothy, and grips the paint well. The film is archival (it’s essentially plastic), and creates a stable bond with oil paint.

I started with a drawing on paper, which took the first 4 of 8 sessions with the model. The block-in is below, you can see the full drawing in an earlier post here.

Block-in of Mary
14 x 17 inches, graphite pencil on paper
When I was ready to begin my oil sketch, instead of tracing the contours and transferring the drawing to a painting panel, I simply laid the mylar directly over the drawing and painted on the translucent film, with the drawing visible but protected underneath.

the painting was done at night under artificial light. I don’t enjoy painting in color under artificial light, so I planned this as a monochrome sketch. I used Ultramarine Blue, Burnt Umber, and Zinc white to mix puddles of value. I mixed two “strings” (rows of paint puddles) on my palette each session, one string of cool grays and one string of warm grays. This way I could control the temperature of the values, even though I was not using color.

I really enjoyed working on the Mylar surface, it allowed for a lot of control of the paint and offered a surprisingly agreeable drag - not as slick as you might expect. It was perfect material for a sketch, but I would not do a finished painting on it.

Next time I would use drying agent in my medium, as unlike a chalk-gesso panel it’s completely non-absorbent so it took nearly a full week for each paint layer to dry.

————————

There is still one more spot in my upcoming 1-day workshop:
One-Day Intensive: Blocking in the Figure
Saturday, May 21 

Saturday
Mar192011

Published: "American Art Collector" and "International Artist"

This month my artwork is published in two major art magazines:

International Artist Magazine has published my step-by-step demo of my Self Portrait drawing. Next month they are publishing the steps of the oil painting.
Download the International Artist article PDF 


American Art Collector Magazine has published a preview article for the Still Life Invitational at Susan Powell Fine Art, where I was quoted and my painting “Message in a Bottle” was featured. Also, Susan took out a full page ad in the same issue, and featured my painting “Bottle Collection” in the ad.

Download the AAC Article PDF

What a month!

SHOW INFORMATION:
Susan Powell Fine Art 
679 Boston Post Road
Madison, Connecticut 06443

Show dates: April 1 - May 7, 2011
Opening reception on Friday, April 1, 5 - 8 pm

Thursday
Mar172011

New Painting: "Auriform"

“Auriform (Polished Abalone Shell)”

11 x 14 inches
oil on panel

This painting, along with “Bottle Collection” will be showing at the Susan Powell Fine Art “Annual Still Life Invitational”

April 1 - May 7, 2011
Opening reception on Friday, April 1, 5 - 8 pm

Susan Powell Fine Art 
679 Boston Post Road
Madison, Connecticut 06443

The composition for this painting has been slowly evolving in my mind for months, ever since I found the polished abalone shell at a flea market in Seattle while visiting friends there last Labor Day weekend.

Abalone shells are lined with pearlescent nacre, and I have long admired the turquoise, veined interiors and wanted to paint one. But the outside of the shell is usually an ugly, gnarled granite, and I wondered how I could prop one up on end to expose the more interesting inside. When I found this one, buried in a pile of old clocks and dolls at a flea market, but with the outer shell sand blasted off, I knew I had to have it! 

Since then, the shell has been sitting in a shadowy corner of my still life shelf. As I worked on other paintings over the last several months I watched how the shell seemed to melt into the shadows, leaving the ethereal, pearlescent surface just barely gleaming out of the depths.

Abalone shells are a low, flat spiral shape, and both the colors and the shape seemed to call for spirals of waves submerging it, implying the shadowy depths beneath tidal waves. I arranged the shell low in the composition, and twisted sheets of wax paper in winding spirals above it.

The distressed, painted shelf supporting the still life has become a cherished fixture of my studio, and by now I have painted every chip and knotty whorl along its edge many times. Somehow, the shell just landed at an opportune spot, and the largest knot on the wood seems to act like a faint, inverse echo of the shape of the shell and waves above. As much as I carefully compose my paintings, I like to embrace these happy accidents, which usually only reveal themselves to me deep into the process of painting.

This painting, including the preparatory drawing, took about 5 studio days a week for about a month. Aside from teaching 2 days per week, this was the sole project I was working on for the course of the month. As with all my paintings, I work exclusively from life, never from photos. I use the finest materials: handmade gesso-primed panels, time-tested medium recipes, and quality oil paints, built up in thin layers. My process is inspired by the historical Flemish layering technique, which I feel is the only way to achieve the level of realism and illusion I aim for.

I teach these traditional drawing and painting techniques in classes and workshops at my San Francisco studio.


Sunday
Mar132011

Recent Figure Drawings: Mary and Bilge

Study of Mary
14 x 17 inches, graphite on paper 
12 hour pose

Now that I offer 3 open figure sessions at my studio every week, I myself am doing figure study 12 hours per week!

The above pose we have decided to continue for a couple more weeks, and I am trying an experiment: painting a monochrome oil study of the pose in oil paint on mylar, which is a frosted sheet of plastic film designed for drafting.I usually use it for preparatory countour drawings for my oil paintings.

I use Dura-Lar Matte 2-sided film (be careful not to accidently buy the clear acetate in similar packaging, an expensive mistake!)

The film has nice tooth, creates a good bond with the oil paint, and is an affordable, portable material for oil sketches. Also, it’s translucent, so instead of transferring the contours of my drawing to a canvas or panel, I simply tape the mylar over my drawing and paint right over the pencil study I can see through it. So far I really like the feel of the paint handling on the film, and I plan to use it the next time I work outside. I’ll post photos of the finished painting study in a couple more weeks.


Study of Bilge
14 x 17 inches, graphite on paper
12 hour pose 

Sunday
Mar132011

Class: Block-In Intensive

Recently I organized a full day of model auditions for my studio, where 8 models each posed for one, 20-minute session. It turned out to be a really fun, energizing day of capturing 20-minute block-ins.

I was inspired by the auditions to create a single-day intensive class on the theme: We will spend one day honing our skills for capturing accurate proportion and gesture.

The class will be one, 6-hour weekend day, I have scheduled one in April and one in May.

More info and registration information is here

I hope you can join us!


Wednesday
Mar022011

Drawing: Study of Ward

Study of Ward
graphite pencil on paper, approx 14x17 inches

This study was done over 4 Monday figure sessions, 5 hours each. 

This upcoming Monday, March 7, we will be starting a new pose with a new model.

I offer long pose figure drawing sessions at my studio on Monday afternoons, and Tuesday and Thursday evenings.

On Thursday evenings I also offer a 1-hour demonstration before the group drawing session begins. These weekly demos are like mini classes, without the expense of commitment of a full class.

This Thursday, March 3, I’ll be demonstrating how to create believable 3 dimensional form in your drawings. I’ll also share tips for how to have very precise graphite pencil control for creating a strong sense of light on your subject.

I hope you can join us! More information here:

http://www.sadievaleri.com/model-sessions/

Sunday
Feb132011

New Painting: "Self Portrait at 39"


Self Portrait at 39
12 x 16 inches, oil on panel 

I have been working on this self portrait for the last couple of months. It was an interesting challenge to take the same process I use for still-life and apply it to a self portrait.

The painting is an homage to an 18th century German-born painter I recently discovered named Christian Seybold (1697-1768). I find his painting of a woman in a green veil particularly stunning. I was thrilled to see how he created extremely fine realist surface detail, supported by a structural understanding of the underlying form, and I tried to emulate this. I also took inspiration from the scale and cropping of the portrait, the fur collar, and the paintbrush tucked behind one ear. 

I’ll be posting the initial drawing and all the stages of the painting as a slideshow soon. Here are some close-ups:

Sunday
Feb132011

Mary and Ward Drawings: Block-in

Study of Mary, Thursday evenings
16 x 20, graphite on paper, work in progress


Study of Ward, Monday afternoons
16 x 20, graphite on paper, work in progress


I am now offering two new long pose figure drawing sessions per week at my studio: In addition to the original Tuesday evening sessions 6:30-9:30pm, there are now sessions on Thursday evenings, 6:30-9:30pm, and Monday afternoons, 11:30am-4:30pm.

Before the Thursday and Monday sessions, I am also offering a public drawing demonstration and lecture, where I discuss how I approach academic figure drawing and painting.

These two drawings were from the first sessions and lectures, where I demonstrated how to find accurate proportions using the straight-line block-in technique. When we can judge the angles and distances accurately, we don’t need to rely on measuring or other tools to capture accurate proportions.

Next week, I’ll be demonstrating how to infuse figure drawings with energy, structure, and life, by understanding the 4 essential principles of organic form: Tapering, Interlocking, Spiralling, and Convexities.

Attending the lecture demonstrations is an excellent way to get a preview of my studio and my teaching technique.

For more information and to sign up for figure drawing sessions and demonstrations, please visit my Model Sessions page.

Saturday
Jan292011

Drawing and Painting Workshop Recap

I have just finished teaching a 2-week workshop at my San Francisco studio: 10 days Drawing and Painting. Enrolled to maximum capacity, we had 6 students, all dedicated and serious artists, half of whom flew in from other states to participate!

I was determined to make all that the travel and expense worthwhile, so I warned them from the start this 2 weeks would be “artist boot camp,” to which they eagerly signed on: Six hours at the studio every day, PLUS homework most of the evenings. They all accepted the challenge with good humor and ambitious energy, creating an atmosphere of energy and excitement…. stretched over many silent hours where the only sound was Pandora’s J. S. Bach station on endless play, occasionally punctuated by the…. cheerful? noises of our Mission neighborhood.

I believe that attaining facility in realist painting can only be accomplished with intense study of drawing, so we started out the workshop with a series of graphite exercises studying the essentials of proportion, value, the nature of organic form, constructing accurate ellipses, and a review of 1- and 2-point perspective. We topped it all off with a lesson on successful composition, and the students were off, creating thumbnail sketches and detailed contour drawings, designing the paintings they would work on for the remainder of the workshop.

I can tell you, here are 6 emerging realist artists who will never again paint a floppy ellipse or a screwy perspective line! With just that, I consider my job done.

But we were on to the real task on the workshop: Oil Painting! We went step-by-step through the entire process I use to create my own paintings: umber grisaille underpaintings, followed by 2 full days of “closed” monochrome grisaille. Every painting is brought to the highest level of finish in monochrome before we move onto the holy grail of: COLOR.

All the students spent the first part of each day mixing, mixing, mixing precise color strings representing the full hue, chroma, and value of each step of the form. The rest of the day was focused on a discreet area of their paintings, bringing each section to the highest polish possible for the day.

After 3 full days of painting color layers, the final day is what we have all been working towards: when the highest degree of realism attainable in oil is finally within sight, and the studio is punctuated with “ah hah” moments as each painter realizes what all the exercises and detailed under painting, layers and sweating has been for: creating sparking, stunning realistic form.

I offer a huge congratulations to all of my 6 serious and dedicated students! My method for painting is not for the faint of heart, but I think each student gained a plethora of useful techniques and concepts applicable to many styles of realism. Thank you all for being so enthusiastic, your collective energy has filled the studio with power and focus as I return to my normal quiet solitary hours there.

I am offering this workshop again in August 2011, click for details!


Thursday
Jan062011

Making a Mark: 2nd Place Award

My painting Message in a Bottle was awarded Making a Mark's 2nd Place Best Picture of the Year (Still Life) on an Art Blog - tied with Julian Merrow-Smith for second place. First place was won by Neil Hollingsworth.

I have long admired the work by both these wonderful painters, so I am thrilled to be in their very good company!

Also, a workshop students of mine, Loriann Signori, tied for First Place in the Landscape category, congrats Loriann!

A huge thank you to Katherine Tyrrell who is the author of Making a Mark. She does an incredible job keeping up with what's going on in the world of art blogs!

Wednesday
Dec222010

FAQ: Winged Victory Cast and Studio Wall Color

I often gets questions as to how I got my Winged Victory cast and where to get a good-quality version.

I bought mine after spotting it at a sidewalk sale in 2003. The owner had inherited it from his grandmother, and had had it in storage for many years. He wanted to sell it to someone who knew and loved the sculpture, and I was only to happy to tell him my story of falling in love with the statue when I first saw and drew her at the Louvre in Paris when I was 16. We struck a deal, and the statue was mine, to this day it is my prized possession. The original owner has visited the studio and was happy to see his grandmother's statue in a place of honor.

It's not easy to find good quality replicas, which are casts from the original. If you Google "Winged Victory" you will find a lot of cheap statues, but if you look closely the quality is very low and crude. The form of the figure and the folds of drapery look grotesque and amateurish. They are usually inferior copies by modern sculptors, not true casts from the original.

My understanding is that most museums no longer allow cast molds to be made from their works, so the only molds that exist are historic.

The only place online I know to order high-quality casts made directly from original historic molds is the Giust Gallery: www.giustgallery.com

They have several sizes of the Winged Victory here

 Studio Wall Color

Sadie Valeri Atelier

I am also often asked about the color of my studio walls. We often think of modern art studios as having white walls, which is great for throwing light around the room and getting lots of light onto the easel. However, white walls make it very difficult to control shadows, and when working from life you want a good balance of light and shadow.

I noticed Grand Central Academy and a lot of the contemporary ateliers have dark grey walls. Also, when I Google-image-searched "atelier" I found some beautiful images of restored historic studios with dark walls.

The color I chose for my own studio walls is Benjamin Moore "Sparrow AF-720." Human fleshtones look lovely and glowing next to it, shadows look deep and rich, and it's easy to control the light bouncing around the room.

I used to think it had a touch of green in it, but after mixing the color for my paintings many times now, I find it can be matched accurately from mixing just from Cobalt Blue, Raw Umber, and a little white. Perhaps a tiny bit of the yellow cast of Raw Umber is reacting with the blue to make a tiny touch of green, but essentially it is just a neutral.

Click the slideshow below to see more photos of the studio: