Search this Blog
Sadie's Blogs and Website

For posts 2006-2010
please visit
sadievaleri.blogspot.com

Sadie’s current site is at
SadieValeriAtelier.com

UPDATE February 1, 2021

I have recently discovered that unfortunately this Squarespace blog has failed to maintain most the images for older posts on this blog. Luckily, the original Blogger version is still live at sadievaleri.blogspot.com and all the posts and images from 2006-2010 are still visible there.

For my current artwork, teaching, and blog please visit Sadie Valeri Atelier.


Entries in drawing (125)

Thursday
May152008

Paris: Louvre Sketch after Pajou

Sketchbook:
After Augustin Pajou's "Pluto Chaining Cerberus", 1760

I brought Nowell to the 18th century French sculpture wing of the Louvre today. It was fun to watch his jaw drop as we rounded the corner into the Puget Courtyard, full of the examples of the pinnacle of figurative sculpture. He was content to roam around filming for a while I worked on this sketch.

Wednesday
May142008

Paris: Musee Rodin

Sketchbook
After Rodin's "The Three Shades"


Nowell and I spent the afternoon at the Rodin Museum in Paris. It currently has an excellent exhibit on Camille Claudelle, Rodin's mistress who was an accomplished a sculptor as Rodin. This life-size figure group is outdoors in the gorgeous garden of the museum.

Nowell recreated a picture we took six months ago at Philadelphia's Rodin Museum:

Tuesday
May132008

Paris: Medici Fountain

Sketchbook:
Medici Fountain, Luxembourg Gardens, Paris

Every time I come to Paris I visit Marie de Medici's Fountain, tucked away in a corner of the Luxembourg Gardens. The first time I drew this fountain was exactly 20 years ago, when I was 16 and in Paris for the first time. Maybe I can track down that old sketchbook and post my first drawing of the sculpture.

Friday
May092008

Studio Escalier Workshop: Final Drawings

Sarah Twice
18 x 24, graphite pencil on paper
9 hours each drawing

For our final week at Studio Escalier's Drawing Workshop in Paris we worked on two long poses to practice all the contour and modeling lessons we have been learning from Tim and Michelle - one pose in the mornings and one pose in the afternoons. I decided to put both my final drawings on the same sheet of paper - just a bit of extra challenge for fun.

Here's a slideshow of the stages of the drawings

I had critiques with both Tim and Michelle. Their comments were really helpful and give me a lot to work on for my future drawings:

I need to think about "packing the form" - the human body is made of irregularly shaped packed forms arranged on curves. I need to remember to define the top edges of those forms, the edges facing the light, as much as the bottom edges, the edges facing away from the light.

Also, in both these drawings I've over-modeled in the light. All the darkest shadow is on the side of the model turned way from me, so almost everything I saw was in the light. In my zeal for modeling form I made everything too dark.

I also need to practice seeing the forms arranged in fans arcing off of changes of direction on the contour.

Finally, I need to emphasize structure and solidity, otherwise my approach with soft gradation tends to look too wispy. I agree. I am not interested in making pretty drawings, I want to make strong drawings.

Not only have I learned a lot about drawing from this workshop, but also my expectations for myself have been raised in the process. I have a vision for how well I will someday be able to draw, a vision for how I could draw with a lot of practice and investigation, and it's far more developed than I ever expected of myself before.

Friday
May022008

Louvre Sketch - Hutin Sculpture

Sketch after Charles-Francois HUTIN

This my sketch of a small, 30-inch sculpture done by Hutin in 1744 as his final exit project to graduate from the Royal French Academy.

Wednesday
Apr302008

Studio Escalier Workshop Day 8

tonal study, pencil on paper, 6 hours

(detail of above)

Day 8 of my workshop at Studio Escalier in Paris.

This is a drawing of a 6-hour pose. Yesterday for the first half I focused on the inner movement curves, the block-in, and finally the detailed contour. Tim and Michelle are teaching us to think of the contour three-dimensionally. So I am thinking of the contour wrapping around the body, moving towards and away from me.

I've taken my drawing into Adobe Illustrator and used the software to recreated my original inner movement curves to diagram the process I am learning:

As Tim teaches the technique, we draw three interrelated movements:

We start with the theme, which is the fundamental inner movement curve. The theme starts at the crown of the head, and flows down the center line of the face, down to the big toe of the standing leg, or the leg holding the most weight.

This is a precise curve, it describes specific points on the body and the relationships between these points. (In contrast to simply "expressing" the movement. This is a record of what we see and know about the body, it's not exaggeration or expressionism.)

The second line we draw (above) is the countertheme - the orange line. It's a secondary inner movement curve that travels from the top of the head, wrapping around the body the opposite direction and down the non-standing leg.


Third, we draw the ornament (above). This is the third interrelated movement. As with the theme and countertheme, the ornament wraps around the forms, moving side to side and back to front.

All of the curves wrap around the body three dimensionally. Above is the same countertheme curve, but I've created dotted segments to show where I am imagining it wrapping around the back side of the form. (I do not modify the figure to fit these curves, it's amazing the interrelations it's possible to see once you start looking this way.)

Above I've shown how adding more and more interrelated movement curves begins to describe the form. As I get more and more detailed with my contour line, I can see how every form on the body follows this wrapping helix pattern.

It's interesting to recreate the curves in Adobe Illustrator. The program creates Bezier curves that have a certain mathematical tensile force, and you have to learn to manipulate them to create flowing curves without awkward bends. The behavior of of Bezier curves is amazingly conducive to the Inner Movement Curves - it was shockingly easy to recreate the curves with the software. I have a feeling there is an implicit relationship between the cohesive, efficient, and functional forms of the body and mathematical curves.

Update added 5/03/08
Bezier was a 20th century French draftsman! Wikipedia has a great entry on Bezier curves, and near the bottom of the page you can see elegant animations for how Bezier curves are calculated.

After spending so much time on the contour, I moved on to the tonal value shading. I was surprised how quickly the value study progressed. I think learning the contour with this method gives me a deep understanding of the three dimensional figure, so flowing the light across the form is easier.

I'll end with a quote from Tim:

"I think the idea of theme, countertheme and ornament has the power to revolutionize the way you think about the figurative subject, to really marry your eye to your gut to your mind to your hand, and liberate your imagination."

I agree.

Wednesday
Apr232008

Studio Escalier - Drawing Movement

Afternoon Pose, pencil on paper

I'm practicing drawings based on the "inner movement curve" method in my class at Studio Escalier, and today I really felt something click.

This drawing feels more solid, more believable than my previous drawings. I feel like I am suddenly seeing the relationships between all the parts as a whole, and feeling the three dimensionality of the pose. It has everything to do with what I studied with Ted Seth Jacobs, but Tim Stotz's emphasis on movement is making Ted's teachings come together for me. (Tim was a student of Ted's, so no wonder).

The drawing above started with this drawing of the interior lines of movement:

Afternoon Pose, Phase I

The first gesture lines aren't much to look at. In fact they look somewhat random and loosey-goosey. But it's actually quite precise. They correspond to very specific points I see on the body - and more importantly, the relationship between those points.

Next I started fleshing out the drawing, starting with the legs and drawing more and more inner movement curves to create the full line drawing. The outside curve of the knee has everything to do with the interior angle of the ankle. Everything wraps around and appears again in a logical place.

Afternoon Pose, Phase II

Once I started seeing all the relationships it became like a treasure hunt to find more. They are everywhere, all the way out to the fingertips and I am sure down to the tiniest tissue structures.

Afternoon Pose, Phase III, final

In contrast, this is the drawing I did in the morning, when I was really struggling with the concept. I think you can see it does not have the same energy as the afternoon drawing.

Morning Pose

Studio Escalier has arranged several evenings for us to draw at the Louvre from the sculpture gallery. Tonight was the first night, and it was incredibly exciting to see all the sculptures so powerfully describing the same concepts we have been studying.

This is my drawing of a 30-inch marble sculpture by Dumont, done in 1712. It was in a room full of similar small-scale sculptures, which Tim explained were the final thesis projects which students of the 18th century French sculpture academy had to submit in order to graduate and go on to be professional sculptors. These small works represent the pinnacle of the art of figurative sculpture.

The figure has a clenched fist thrust directly at me... I don't know why I choose such a difficult view. But it made me interested to do more hand studies.

By the way, the Louvre website is amazing. I just found out you can browse the entire collection, room by room. I found the room we were drawing in today here.

Tuesday
Apr222008

Studio Escalier Drawing Workshop

Pencil on paper, 2 hours

Pencil on paper, 5 minutes

These are a couple of my first drawings done at Studio Escalier in Paris this week.

Tim Stotz has us focusing on "inner movement curves" to establish the proportions, instead of using the straight-line block in. Also, we are doing 5-minute to 2-hour drawings. Both are very foreign to me after a year if doing 20-40-hour block-in drawings. But it's a good approach for me to practice and I'm enjoying a more responsive and less analytical way to draw.

Tuesday
Apr012008

Michael Grimaldi: Portrait Painting Workshop

Portrait Study
charcoal and graphite on paper

about 4 x 4 inches


Two years ago, in Summer 2006, I set up an art studio in my loft, hired a series of models for a few weeks and started figure painting after nearly a decade away from art.

I was totally out of touch with the art world, and so I started poking around on the internet to see if any US galleries were showing figurative/realist work.

I immediately found Arcadia gallery in New York and was inspired, intimidated, and fascinated by the amazing work I found there. The painting "Nude with Tattoo" by Michael Grimaldi in particular stood out to me, and so I Googled his name to find out more about the artist.

One of the first search results was for a workshop Grimaldi had taught right here in my own back yard at Bay Area Classical Artist Atelier... but I had just missed his workshop by a few weeks! The BACAA web site said Grimaldi wouldn't be returning until 2008, so I had nearly two years to wait for his return.

In the meantime I looked around the BACAA web site and was amazed by all the incredible artists teaching there. So I signed up for a March 2007 workshop taught by Juliette Aristides, and began a new era of my art life. (You can read my blog post about that workshop with Juliette here.) I have since spent the last 14 months taking workshops with Juliette, Dan Thompson, and Ted Seth Jacobs.

Now, this week, the Michael Grimaldi 2008 workshop I have waited so long for has begun! The class is portrait painting, and we are starting with small thumbnail sketches to work out the composition and design of the final painting. Tomorrow I'll start blocking out the design and major proportions on my canvas. (The above sketches are charcoal on paper, each just a few inches.)

FRANCE
Two weeks from today I fly to France for a 3 week workshop at Studio Escalier. After the class Nowell is joining me and we'll spend another 3 weeks just hanging out in Paris. I'll be bringing my new pochade box, so watch for upcoming plein air oil sketches of Paris!

JULIETTE'S BOOK: CLASSICAL PAINTING ATELIER
Juliette Aristides' new book, Classical Painting Atelier has just been released and I just received my pre-ordered copy from Amazon today! I plan to spend the next couple hours poring over it before bed. From a quick peek it looks like a gorgeous follow-up to her first book, Classical Drawing Atelier. These are incredibly inspiring books, with beautiful reproductions by both classical and contemporary realist artists. I highly recommend them both for any art lover.

Thursday
Feb282008

Train Tunnel Drawing


Train Tunnel at Carl and Cole, San Francisco
12 x 16 inches
vine charcoal on paper

Inspired by my plein air painting session with Mary yesterday, I decided to step out my front door today and try an outdoor sketch. This is a view of the entrance to a train tunnel in my neighborhood. I always admire the afternoon light bouncing in it and have been wanting to paint it for a while. I'm hoping to do a color painting, too. The tunnel interior is painted butter yellow and I just love how the curved shadow creeps around the inner surface. It gets a gorgeous reflected glow within the shadow.

I think one of my biggest problems with painting outdoors is that I am very shy to draw or paint where people can watch me. I hate anyone seeing my work before I feel it is in a good state. I've decided I have to get over this. So even though I live in a very pedestrian-heavy neighborhood I decided to brave the stares and set up right on the sidewalk. It was easier than I thought it would be.

I got a really nice compliment while working: A woman stopped and chatted with me, she said she was an artist too. She said she noticed that even though from far back the drawing is very hazy, that in fact close up there is a lot of structure. Structure!! I've been working explicitly on structure for months so I was thrilled she chose this word. I thanked her profusely but I don't think she realized how much it meant to me.

Sunday
Feb242008

Ted Seth Jacobs - Drapery Study

Drapery Study I
graphite on paper
18 x 24 inches (detail)

Drapery Study II
graphite on paper
18 x 24 inches (detail)

I've just finished 12 weeks studying drawing with Ted Seth Jacobs at BACAA. We spent the final week modeling a satin jacket which was put on a mannequin. It was an amazingly difficult final project, it really felt like a test of everything Ted has been teaching us about how to analyze three dimensional form.

These are the 4 main principles Ted taught us to apply when analyzing form:

Convex Form
Everything in nature is curved, nothing is flat. All of these curves are convex, there are no concavities. If you look closely at a seemingly-concave drape or indentation, you can always see small convexities along it. This is evidence of the underlying structure. (It sounds implausible, everyone doubts it when they first hear it, but try seeing it, it's there).

Wide to Narrow
Nothing in nature is parallel, every shape starts wide on one end and gets narrow on the other. A shadow shape will always be a fan, not a square or rectangle. Use this concept to "shape the light".

Rounding and Ending
Every shadow rounds over a curved surface and ends before the next form begins. This means every form shadow has a soft edge and a hard edge. Think about the direction of the light - generally the edge of a shadow closer to the light source will be soft, and the edge away from the light will be hard.

What's in Front
The only point on an object not foreshortened is the point directly in front of your eye, everything else is foreshortened. That means every form is in front of or behind another. There are thousands of tiny "horizons", the edge of a shape we look across to see the next shape.

The hardest part is that all of these principles apply to every form. A rounding-and-ending shadow has a wide-to-narrow shape and it always describes a convex form which is in front or behind something else.

Saturday
Feb162008

Venus de Milo (in progress)

Drawing of the Venus de Milo (in progress)
18 x 24 inches
charcoal on paper

(I already posted this photo but I thought it would be nice to see it near the updated drawing)

I spent a long time today refining the contour before I started shading, but I forgot to take a photo at that point.

It helps to have worked out the contour before the modeling. Even so, I am having a really hard time with the face. I've made her looks like she is glaring at something intensely, so I'll have to work on that.

All that drapery is going to be challenging...

Saturday
Feb162008

TSJ Portrait Workshop: Bridgette

Bridgette
18 x 24 inches
graphite pencil and white chalk pencil on toned paper
about 20 hours

I experimented with a new technique with the white chalk. Unfortunately, what Ted is teaching requires so much modeling, I don't think it works well with the chalk, which gets ground in and over-manipulated in trying to get very fine detail.

Besides all that, I am happy with the drawing, especially how it compares to my first portrait of Bridgette I did 9 months ago. I feel like in this new drawing there is more a sense of the dimensional feel of the landscape of her skin. When I am drawing now I feel like my pencil is actually touching the surface of the form, like sculpting. Previously I only thought about copying lights and darks, so this is a totally different approach for me.

I do think a combination of the two is best. I first have to "flatten" my vision and record the major proportions without thinking of them as three-dimensional, in order to get the proportions right. But when the major proportions are set, there is a sense of switching to a different mode, thinking in 3 dimensions, and looking very closely at the surface, watching how it undulates towards and away from the light, and towards and away from the picture plane.

I think if you look at my first drawing, you'll see that there is no sense of being able to touch the surface of Bridgett's skin, it's just flat blankness.

I have no idea how anyone ever did or does portrait commissions from life. The pressure to achieve likeness in as short a time as possible must be tremendous.

Saturday
Feb092008

TSJ Portrait Workshop: Melissa

Melissa
18 x 24 inches
pencil on paper
about 30 hours

Despite some problems with the drawing, this is probably the best likeness I have ever done. I may have made Melissa look slightly more gaunt and maybe slightly older than she is, but the proportions and placements I feel are pretty reminiscent of her as a specific person.

I feel like Ted's lessons are really starting to sink in, and my drawing is much improved since I started working with him. He's taught me to think of the 3-dimensional forms of what I am looking at (and subforms, and subforms and subforms...), and to try to understand everything in 3 dimensions, instead of just "copying" a pattern of lights and darks. The result is a much more solidly volumetric drawing.

Next week we will be drawing Bridgett, whom I first drew last year, and I can't wait to compare the drawings and see what I have learned.

I've also started experimenting with softer (darker) pencils. I usually use hard pencils, 2H and H, and just gently go over and over to build up the tone. But for this drawing I tried using a combination of 3B and H pencils. I really liked the effect, much larger range of value.

A weird effect is happening in my eyes recently. I am looking very closely at the model, and I guess I am really staring for quite a long time, because sometimes when I look at my paper to draw I am momentarily blinded. Instead of my paper and my drawing, I see the after-effect of the model's image burned into my retinas. It's very disconcerting.

Aside from classwork, this is a sneak preview of what I am working on in my studio right now:

Saturday
Feb092008

TSJ Portrait Workshop: Melissa's Profile

Melissa's Profile
18 x 24 inches
graphite pencil on paper
about 20 hours

This is the drawing I did the third week of Ted Seth Jacob's portrait drawing class. This doesn't actually look much like Melissa.

Saturday
Feb092008

TSJ Portrait Workshop: Mona

Mona
18 x 24 inches
graphite pencil on paper
about 40 hours


My second Ted Seth Jacob workshop just finished it's 4th week (of 6) and I thought I would post what I have been working on. This drawing of Mona was from the first 2 weeks of the class.

Most of the students in this workshop were also in last November/December workshop, so Ted is showing us how the principles he taught us for figure drawing apply to portraiture.

I have to say, portraiture is very very hard. Struggling to get a likeness had reduced me nearly to tears more than once these last few weeks.

Ted always says "you must allow yourself to relax and be open and receive all the information coming into your eyes." I really agree, because I'm finding that forcibly trying to spear a likeness instead just chases it away.

Something about the human face makes us even more critical I think. The ability to recognize a face is hard-wired into our brains, and so we all have a highly developed ability to distinguish faces from one another by minute differences. But seeing the inaccuracies and being able to fix them are not the same thing.

Sunday
Dec092007

TSJ Workshop: Reclining Nude II


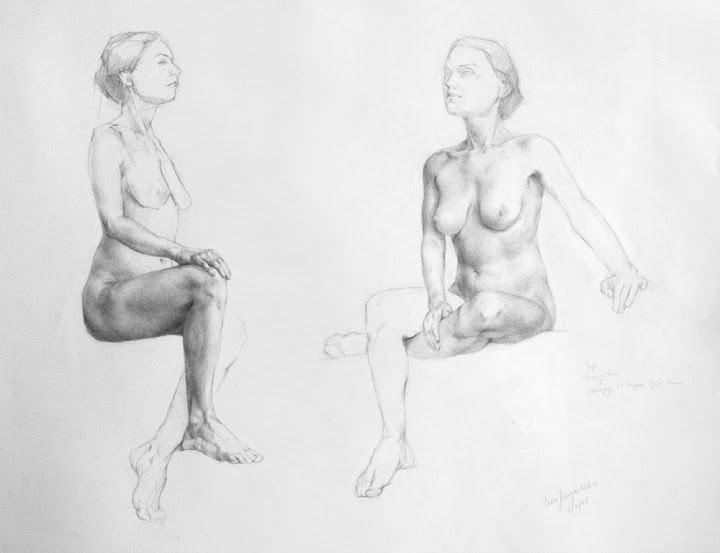
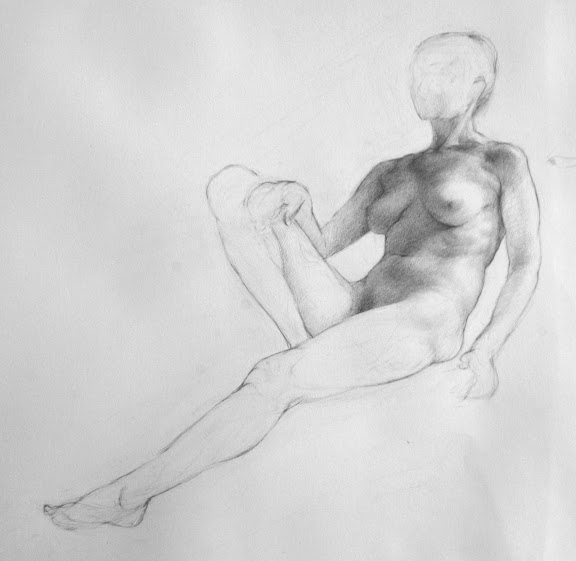
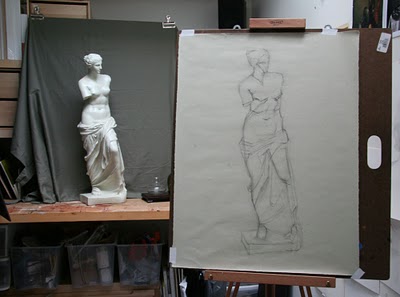
pencil on paper, 18 x 24 inches


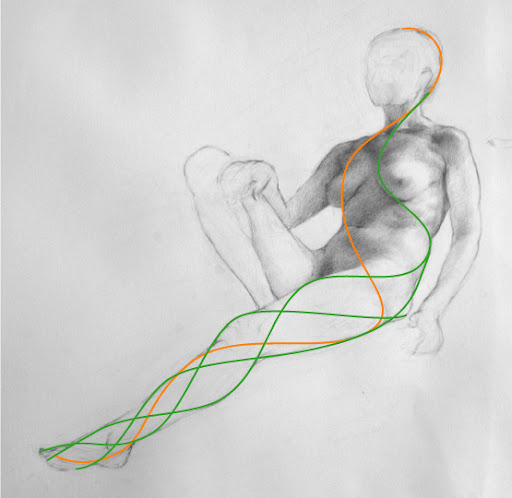
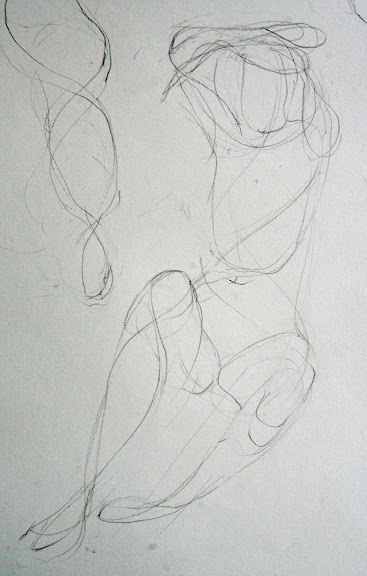
I have now worked on this drawing for 2 weeks, or 10 sessions. See the earlier version here.


I have one more week left, so I have to decide what to do. Do I continue to modify and refine this drawing, or do I start a new one?

I’ve gotten some great comments from my artists group (we are a group of artists of all kinds, writers, animators, singers, and filmmakers, and we meet monthly to share our latest endeavors over wine and snacks.) Of course they said complimentary things, too, but they very astutely pointed out the places I am struggling.

I need to resolve some issues with her right shoulder, her back, and refine the face & hair a bit more. They loved the elbow, which is one of the last things I worked on, so maybe I will try to apply what I learned there to the back, which I worked on very early in the drawing.

I am really enjoying my workshop with Ted Seth Jacobs, he is teaching me new ways to understand what I am looking at. The elbow in the the above drawing is I think most evident of what I am learning.

Paris, 15 years later

I am very excited to learn that I have been accepted to a figure drawing program in Paris for three weeks in April 08. The course is taught by former students of Ted’s who live and teach in France, their school is Studio Escalier. I studied at Parsons Paris for 6 months in college, back in 1993, so I am looking forward to visiting Paris as an art student once again, 15 years after the first time.

Notes from TSJ

I have transcribed some more of my notes from TSJ’s teachings. These are some of his overall themes, the ideas he repeats no matter what specifics he is showing us:

“I am not your teacher: nature is your teacher. But you have to have knowledge of the principles of form to understand what nature is showing you. These principles are helpful only as far as they help us see nature. If nature disagrees with a principle, nature is right, the principle is wrong. Nature is our teacher always.”


— Ted Seth Jacobs


Contour

  • Contour is not flat, it is moving in 3 dimensions, back and forward
  • Every contour on the body is held in a balance of tension between opposing forces.
  • Every change in the contour is a result of 3-dimensional form


Light and shadow


  • Everything is divided into light and shadow. Always know whether you are working in the shadow or in the light. There is no such thing as “halftone”. There is only:
    Light light
    Dark light
    Light shadow
    Dark shadow
    Accent (the darkest dark)


See the model as a flat ribbon of light

  • Squint your eyes to simplify the lights and darks
  • Don’t worry about highlights, pay attention to the largest masses


    Ask yourself:

  • Which end is closer to the light source?
  • What is the tilt of the ribbon to the light?
  • What is the lightest part of the pose?


Model the smaller forms in harmony with the larger value relationships.


Think about the three dimensional forms, not just a two dimensional pattern of lights and darks.

The edge of the shadow (also called the terminator, or core shadow) is not an impenetrable wall, there are forms criss-crossing through it

[UPDATE 12/2013 - Due to widespread misunderstanding of the term Terminator, I feel it’s important to revise my notes here and state clearly that the Terminator is NOT the same as a core shadow. It’s not even the “edge of shadow”. It’s the ending of the light, at the point where the form turns away from the primary light source. Ted never called it a Core Shadow, that was my misunderstanding 6 years ago when I took these notes. -SJV] 

Shape the light to describe the form;
See what end is wider, which end is narrower; it’s often a “fan” shape, edges are never parallel

Form principles

  • Even a concave shape is made up of tiny convex forms
  • Each shape is a wedge that interlocks with other wedge shapes
  • Find the specialness of each shape
  • Make a portrait of each shape

We are not copying: copying is trying to capture what you see without understanding what you are looking at.
We are not representing reality; we are suggesting reality.
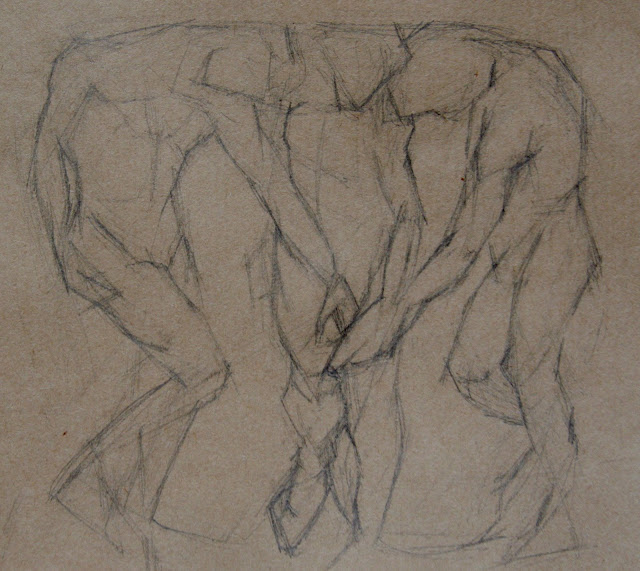
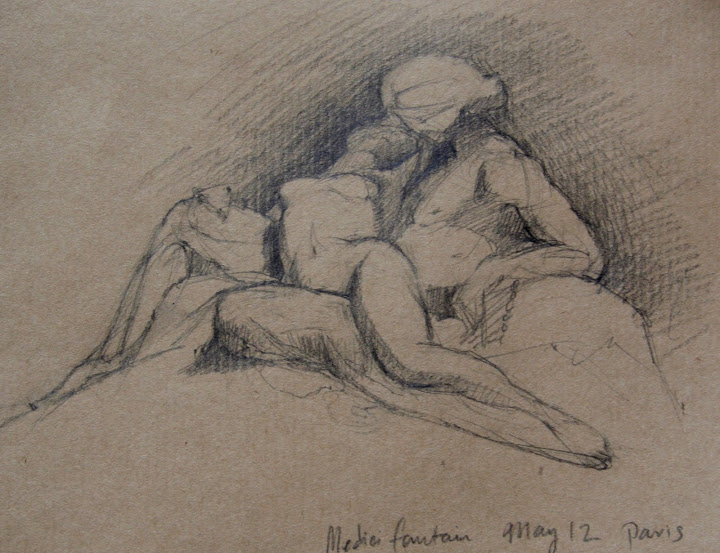
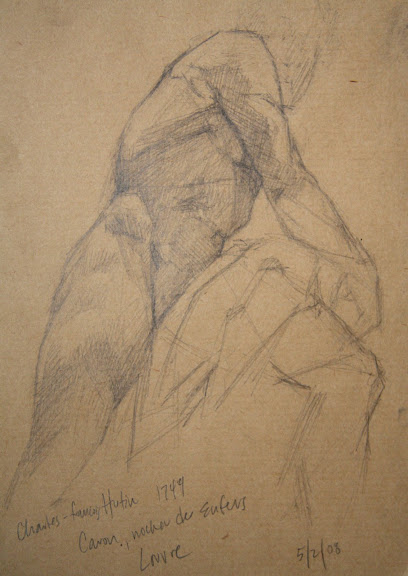
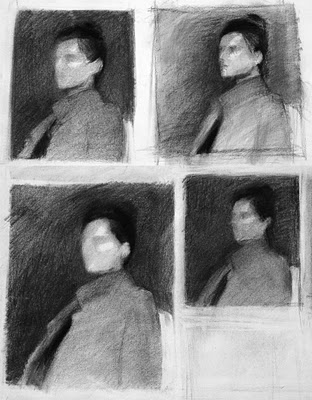
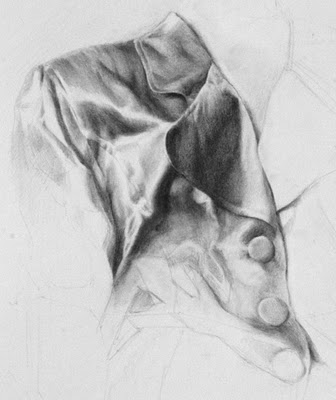
 

Thursday
Nov292007

TSJ Workshop - Reclining Nude I

18 x 24 inches, pencil on paper

We are now in the 4th week of Ted Seth Jacobs' drawing workshop at BACAA.

This week we started drawing a 3-week pose. Today is the 4th day, and I spent the first 3 1/2 days struggling with the block-in. I don't know what it is, something about the leaning tilt, but it is an incredibly difficult gesture to capture. I erased and started again a half-dozen times. But practicing a block-in is a good exercise, so the time was well spent although I don't have much to show for it.

This is an interesting stage of the drawing, because you can see the earliest marks of my block-in, especially at the feet, as well as the more polished part by the shoulders.

While I draw I repeat in my head over and over "rounding and ending", which I described here. The practice of thinking about the three-dimensionality of each protrusion is a a new technique for me. Also, being conscious about which sides of a shadow are soft, and which sides are crisp is really helpful. Repeating "rounding and ending, rounding and ending" helps me remember.

I have also been thinking a lot about how to paint and draw nudes, especially female nudes, without relying on a traditional idea of beauty as a hook. I think about how to depict an individual without reducing her to an idea of a woman. There is so much history to contend with, it's hard to resist. The temptation is to emphasize her beauty. Especially because this model is tall and slim and attractive, and especially because she has been arranged in a classical pose.

My goal is to try to depict her as a real, breathing human being. Let's see how I do.

Tuesday
Nov202007

TSJ Workshop: Head Study Day II

Looking at anyone from this angle makes their face look wide and their nose upturned... but Melissa does not have a wide face nor an upturned nose. I think in this version she looks more like herself than in the previous session, where she looked like some sort of plump Swiss Miss character.

Ted has been teaching us about "rounding and ending" a shadow. This is where a shadow is shaped by the light falling over the rounded edge of a form, which makes a soft gradated edge. Then the shadow ends in a crease, a hard edge, before the next rounded form begins.

This hard edge is eventually slightly softened through "knitting" the two forms together, but the basic idea is seeing where the shadows have soft edges (over a curved surface) and where they have firm edges (at the crease between two forms).

You can see this most explicitly at the hollow in Melissa's upturned cheek. (It's even more exaggerated in this photo of the drawing, and I will say, it's very frustrating to work for two days to calculate every value, just to have it all destroyed in the photo!).

Anyway, you can see how the shadow rounds down off the hight point of her cheekbone, and falls into the crevice above her jawbone - "rounding and ending". I tried to practice this all over the drawing.

At this stage (about 7 hours into it) the forms are all still generalized, but if I had more time with this pose I would go further and see how many sub-forms I can find.

Had fun with the hand and it went very quickly - I did most of it in just two 20-minute sessions. You can see the "rounding and ending" concept over the tip of the index finger quite clearly, too.

Monday
Nov192007

TSJ Workshop: Head Study

pencil on paper, 3 hour pose

I decided to try a new drawing of just the model's face and hand these last two days of the pose.

Something is not quite right... the angle is difficult, but I was hoping to catch more of a likeness, and this doesn't look much like Melissa. I'll try to discover what is wrong tomorrow.

Page 1 ... 2 3 4 5 6 ... 7 Next 20 Entries »