Search this Blog
Sadie's Blogs and Website

For posts 2006-2010
please visit
sadievaleri.blogspot.com

Sadie’s current site is at
SadieValeriAtelier.com

UPDATE February 1, 2021

I have recently discovered that unfortunately this Squarespace blog has failed to maintain most the images for older posts on this blog. Luckily, the original Blogger version is still live at sadievaleri.blogspot.com and all the posts and images from 2006-2010 are still visible there.

For my current artwork, teaching, and blog please visit Sadie Valeri Atelier.


Tuesday
Apr192016

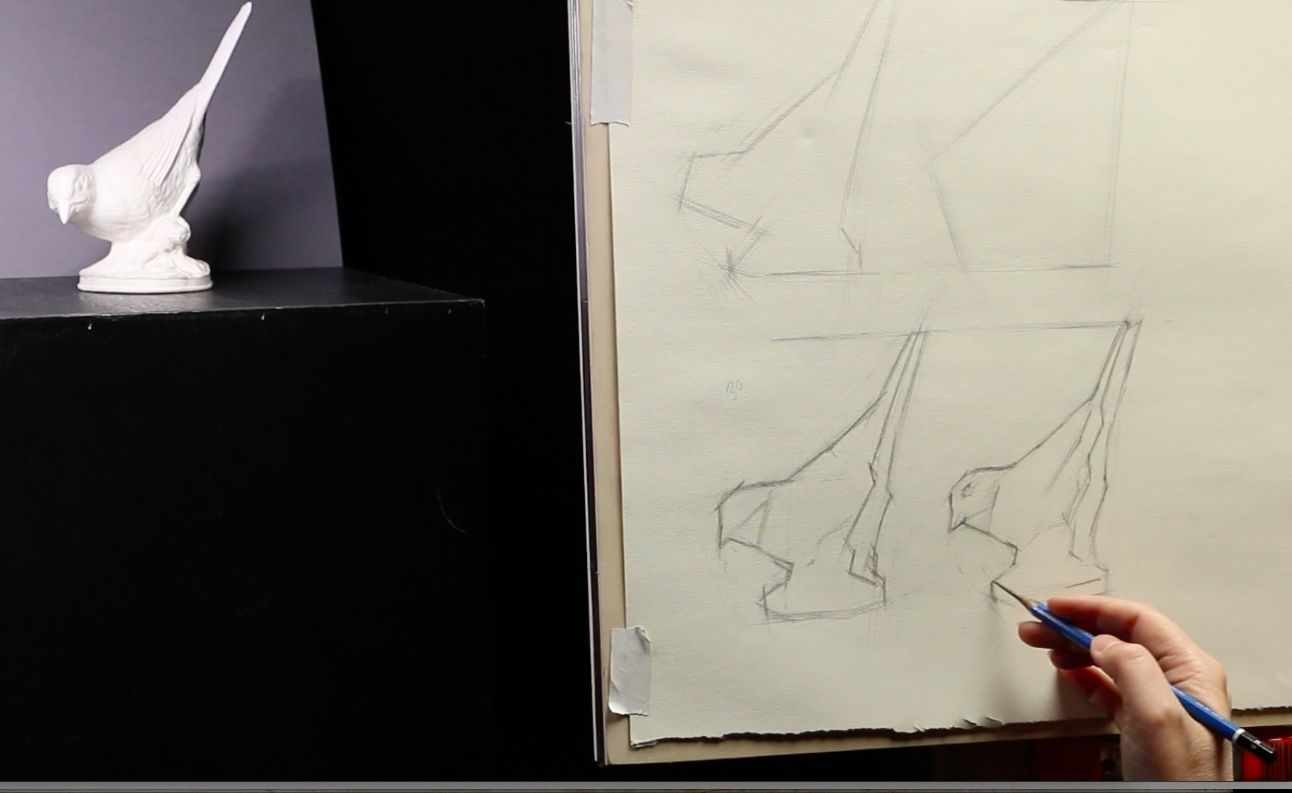
New Video: Block-In From Bargue Plates and From Life

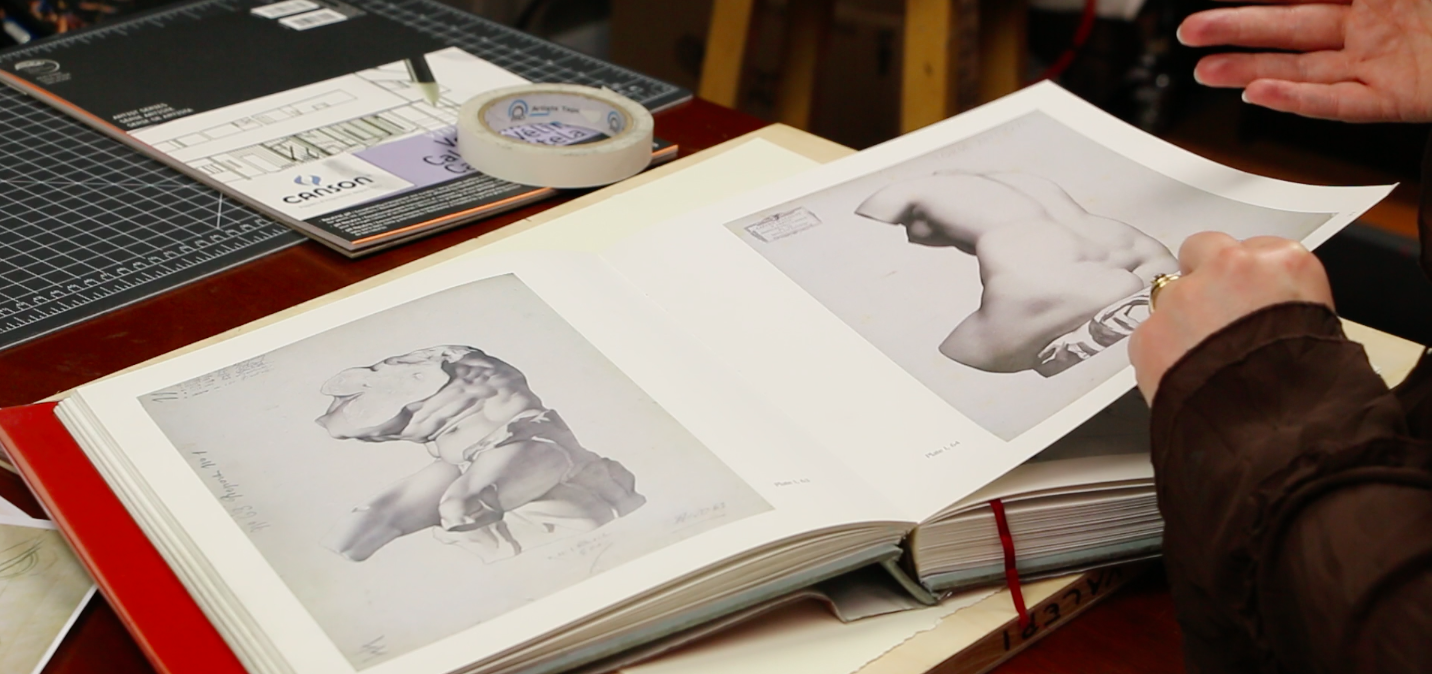
Learn to Draw with Bargue Plates Part 1: Line Drawing and Proportion

Our latest videos teaching the classical drawing method of Straight Line Block-In are now available streaming in our Online Atelier.

Bargue Plates are 19th century lithographs of drawings by the painter Gerome created specifically to teach students how to draw. They are brilliantly executed and organized, and lead the student from drawing simple lines up through creating fully rendered figures, all based on casts of ancient Greek and Roman sculpture.

In the video I also demonstrate how to apply the same methods and principles to drawing 3-dimensional objects.

Join Sadie Valeri’s Online Atelier now for streaming access to all of Sadie’s videos:

Monday
Mar282016

Book Cover: Lessons in Classical Painting

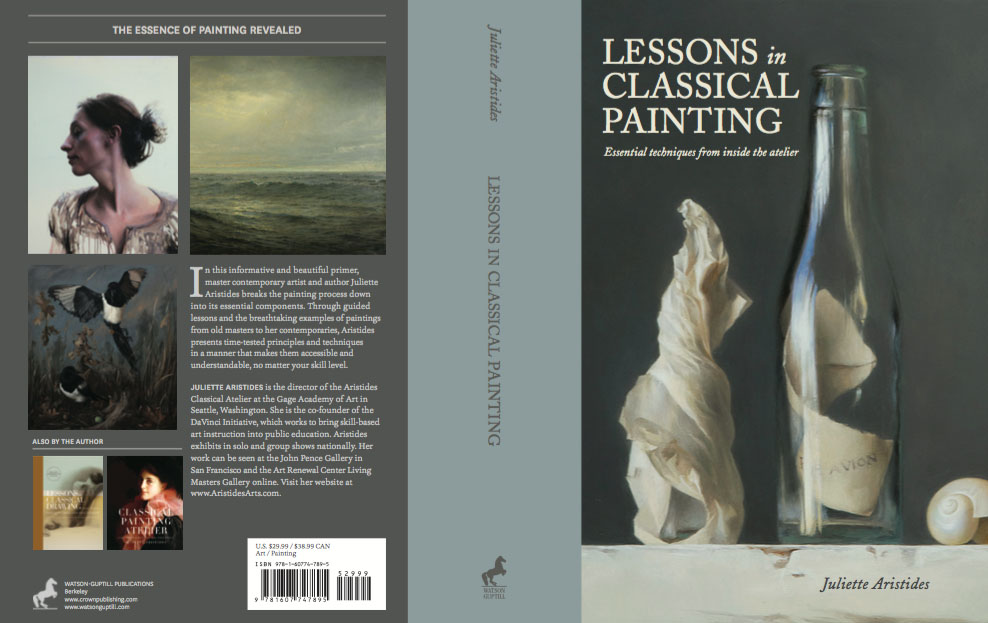
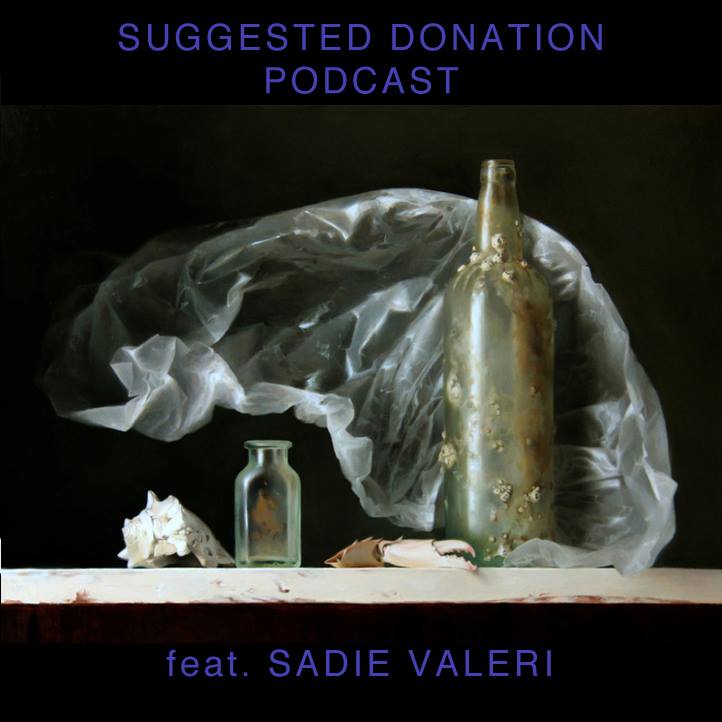
I’m thrilled to announce that my painting Message in a Bottle has been chosen to be on the cover of Juliette Aristides’ new book, Lessons in Classical Painting.

The book can be pre-ordered on Amazon HERE

To launch the book there will a second event at John Pence Gallery, two weeks after our show opening:

Show Opening: July 15th, 6pm-8pm
 
Book Signing: July 29th, 6pm - 8pm

John Pence Gallery, 750 Post Street
San Francisco, California 94109

Phone: 415-441-1138


Monday
Mar282016

Show at John Pence Gallery

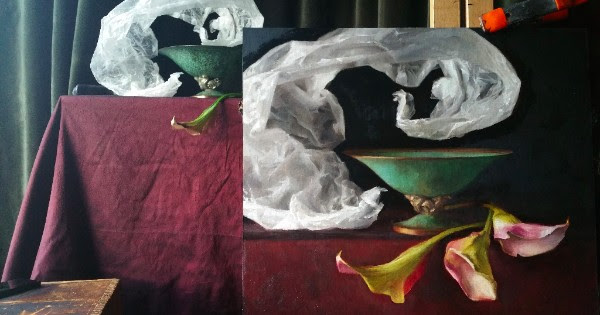
Calla Tempest, 16x20 inches, oil on linen

I could not be more ecstatic to share with you that I will be participating in a three-person show at the prestigious John Pence Gallery this summer.

I’ll be showing alongside Juliette Aristides, known for her books about classical art training and for her atelier in Seattle, and also with Elizabeth Zanzinger, former student of Juliette’s and current instructor at my own studio.

The image above is a work-in-progress shot of my current piece for a new series I am creating for the show. The working title is “Calla Tempest” and it is 16x20 inches, oil on linen mounted on panel.

The Opening details are below, I would be honored if you could attend!

John Pence Gallery Opening:
July 15th, 6pm-8pm

750 Post Street, San Francisco, California 94109
Phone: 415-441-1138

www.johnpence.com

Friday
May012015

My Interview on the Suggested Donation Podcast is now Available!

I had so much fun talking with artists Ted Minoff, Tony Curanaj and their sound editor/moderator Jay Braun a couple weeks ago in New York. They recorded our conversation to include in their amazing series of artist interviews for their Suggested Donation podcast. I talk about my artistic journey as an artist, how I discovered classical realism, what this kind of education has meant for me. We also laugh a LOT.

Available streaming or as a free download through iTunes here:
http://www.suggesteddonationpodcast.com/blog/2015/4/29/episode-17-sadie-valeri 


Sunday
Jan112015

Lecture by George O'Hanlon of Natural Pigments

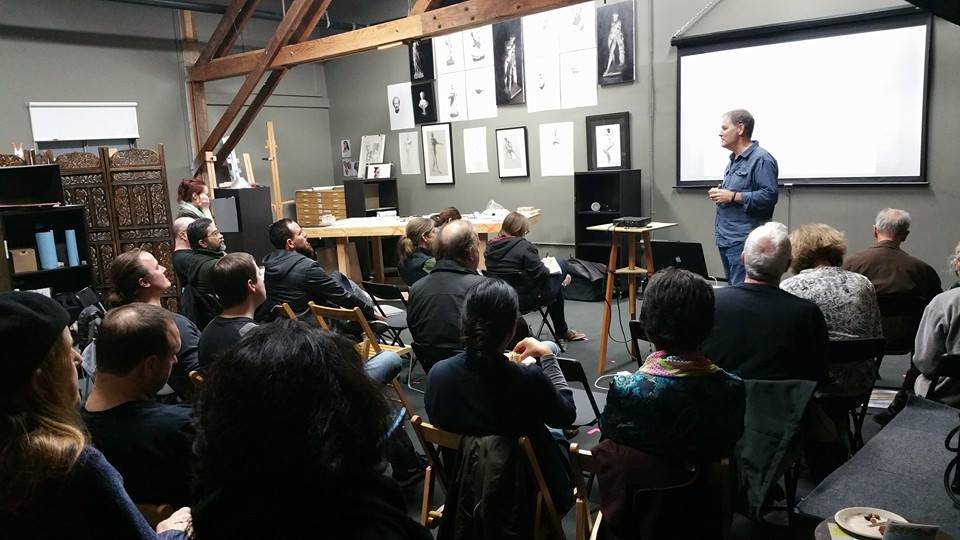
Last Friday evening we all enjoyed an incredibly informative 3-hour lecture on “Painting for Posterity” with George O’Hanlan of Natural Pigments, manufacturer of high quality artists’ materials.

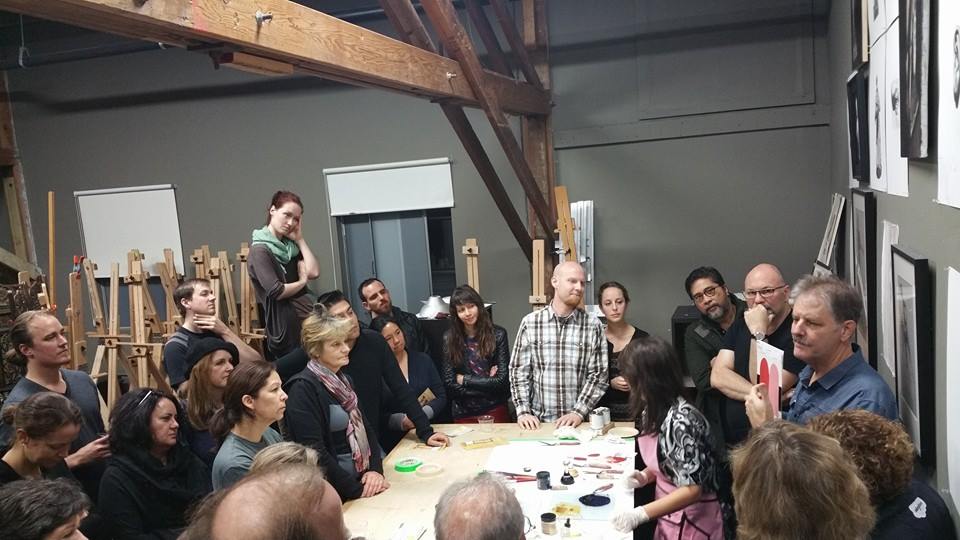
George and his wife Tatiana presented the lecture and gave a live paint-mixing demonstration, sharing all the knowledge they have gained through extensive scientific analysis of the materials artists depend upon.

George and Tatiana return to my San Francisco studio in May to teach a 3-day workshop on “Painting Best Practices, I hope you can join us!

About the workshop:
“Natural Pigments spent years developing a technical workshop to teach skills that are not taught in art school and universities—a thorough understanding of artist’s materials and tools, what they are designed to do, when to chose them and how to provide considerable longevity to your finished work. This workshop covers the most important aspects of painting that have proven to be the best practices over the centuries.”

>> Click here for more information about the “Painting Best Practices” workshop

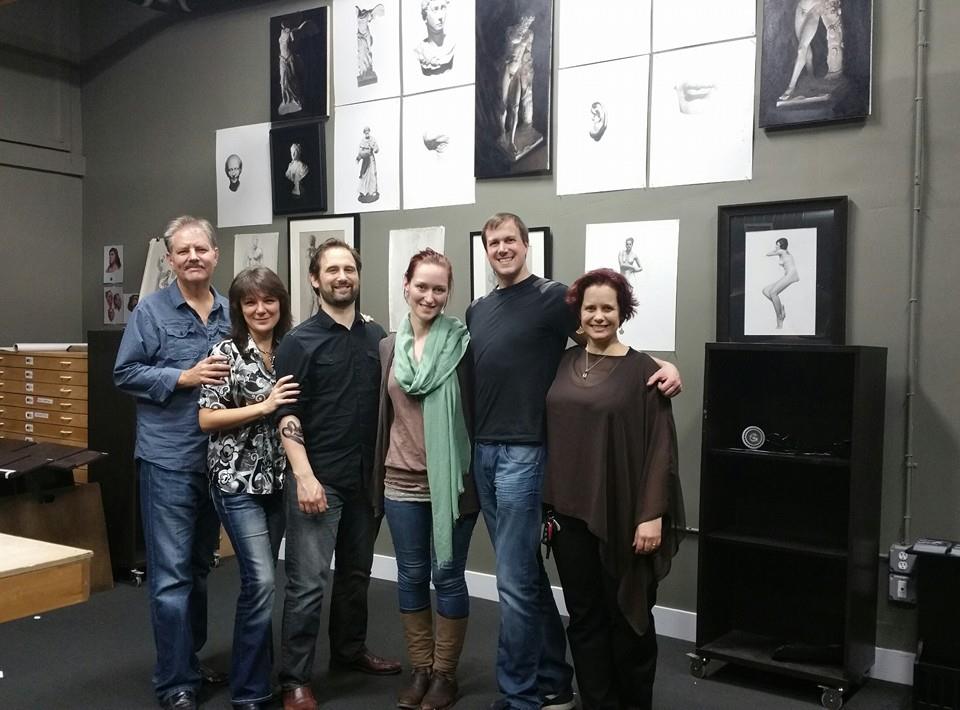
George O’Hanlon, Tatiana Zaytseva, Nowell Valeri, Kate Stone, David Gluck, and Sadie ValeriThe lecture was a wonderful way to wrap up our 5-day workshop with Kate Stone, who taught an inspiring workshop on “Textural and Optical Effects in Still Life Painting”, showing us how she achieves incredible, tactile effects for subjects such as wood grain, fur, glass and a variety of natural objects.

Students were encouraged to bring their own materials in addition to a variety of subjects we provided, and each were able to create a painting to experiment with all the methods Kate teaches. We were lucky to have Kate’s husband, painter David Gluck, participate in the workshop as well.

Together Kate and David author the blog “Painting Stuff to Look Like Stuff” which has established itself as one of the most informative and entertaining sources of information for realist painters.

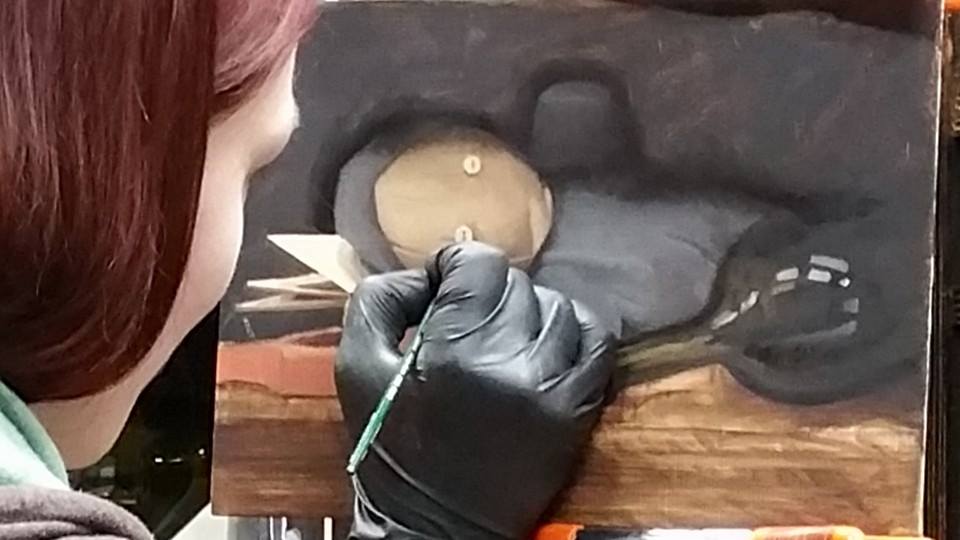
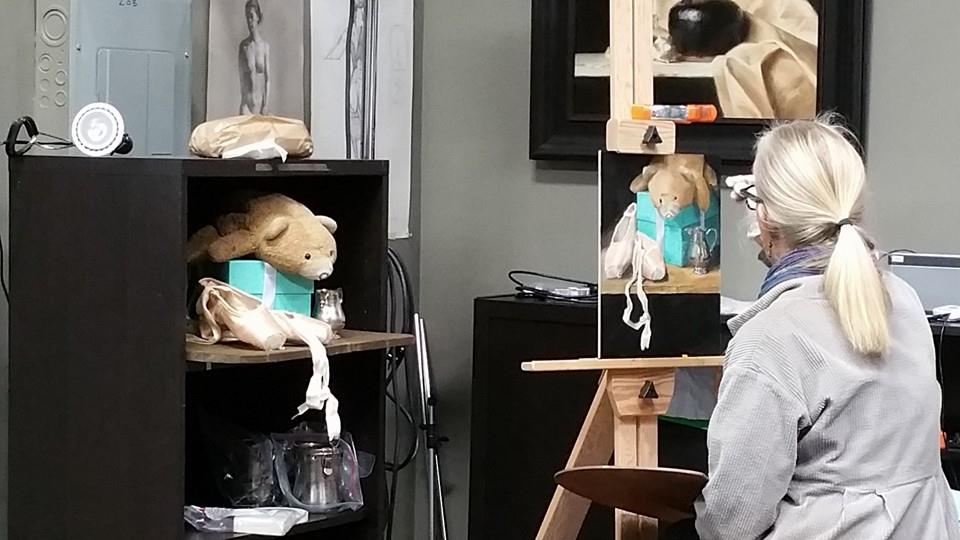
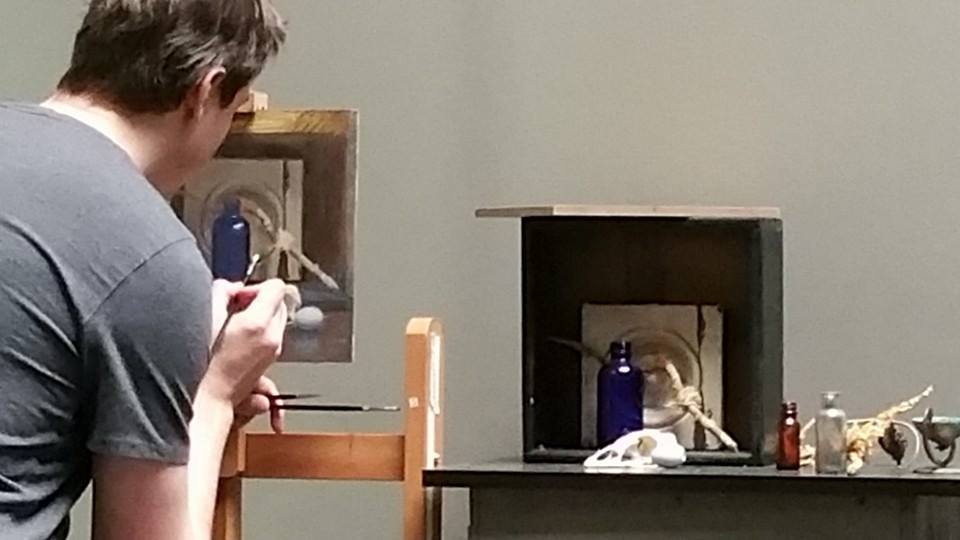
Kate working on her demo paintingStudent working on her paintingDavid working on his painting

Kate teachingThank you so much to Kate Stone, Dave Gluck, George O’Hanlon and Tatiana Zaytseva for bringing such inspiration and knowledge to the studio this week!

Friday
Oct102014

Oil Transfer: Demo by James Edmonds

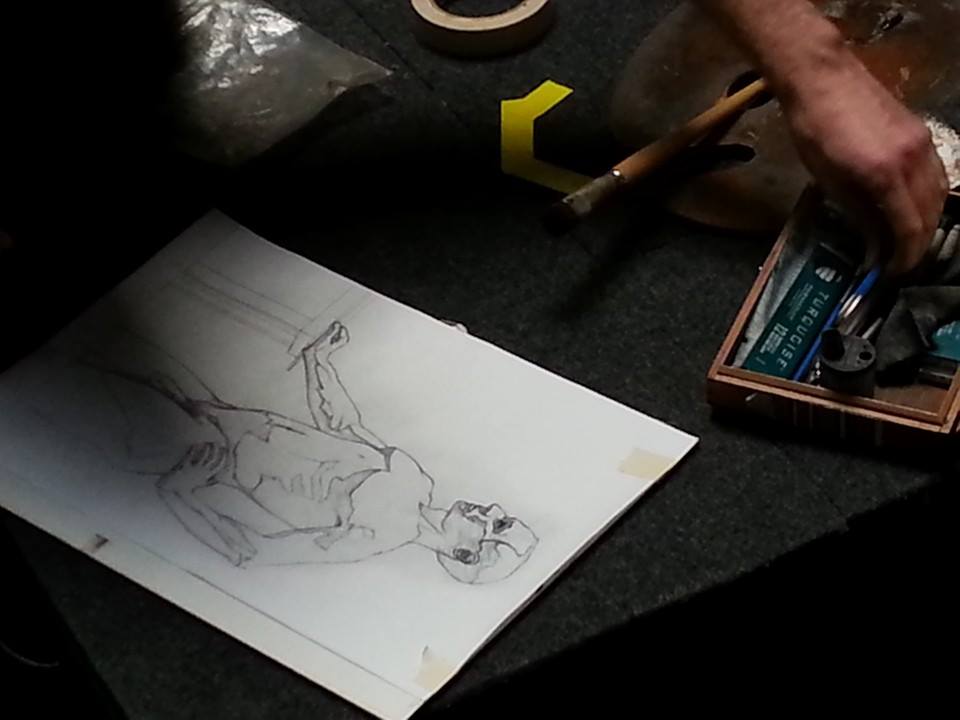
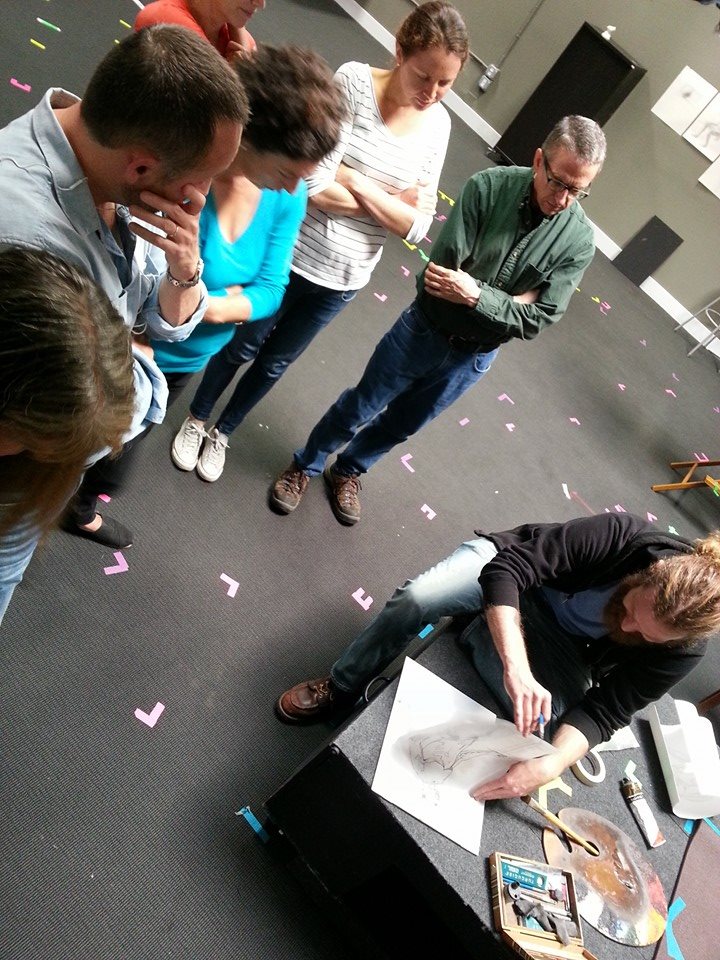
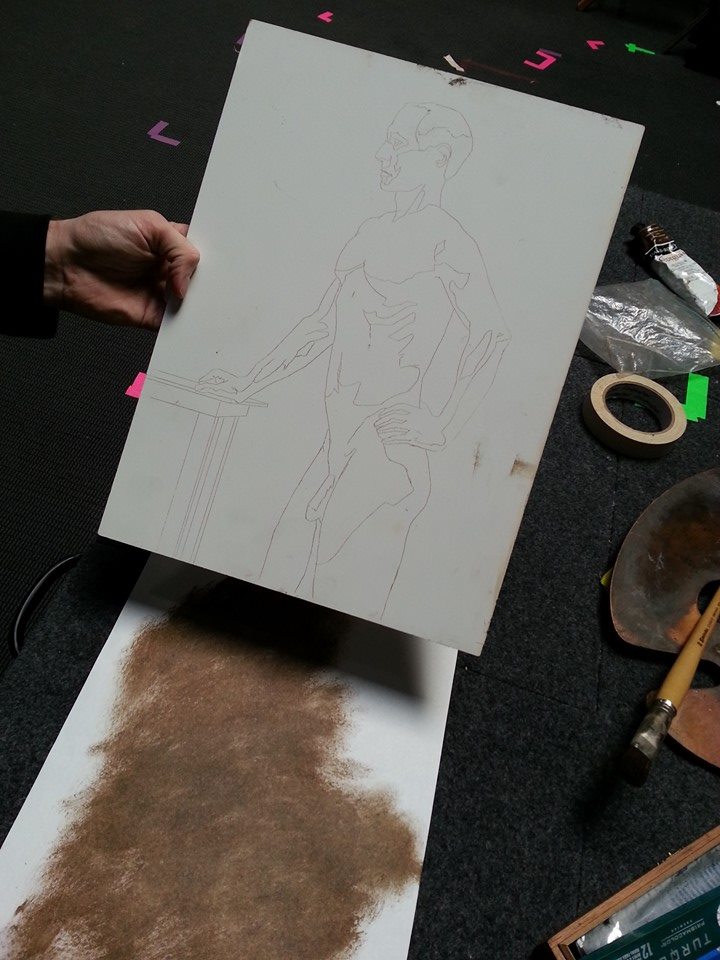
James Edmonds showed us how to transfer a drawing to a primed painting panel with oil paint.

James Edmonds’ Demo:

“The following steps will take you through the process of transferring a drawing to a support with oil paint. This method ensures that your transfer will play nice with your painting because they will both be in the same medium.”

“I usually use raw umber or burnt umber for these because it dries quickly. The sooner its dry, the sooner I can start painting without effecting the lines. However, if you don’t mind painting into your lines while they’re still wet, feel free to use whatever color you wish.

The first step is to make a basic photocopy of your drawing. Yep, a cheap ten cent copy from OfficeMax will do the job just fine.

“When making your photocopy, it’s usually a good idea to change the copiers settings to as dark as possible. Sometimes the default setting doesn’t copy lighter graphite lines. Proceed to grab a drawing implement from your kit. 


“Start by applying a thin layer of paint from the tube. Don’t thin it with anything (turp, etc). You want this layer of paint to be as thin and dry as possible. Too much paint will soak through the paper and deposit excess paint on your surface. Use as little paint as possible to cover and really brush it around.

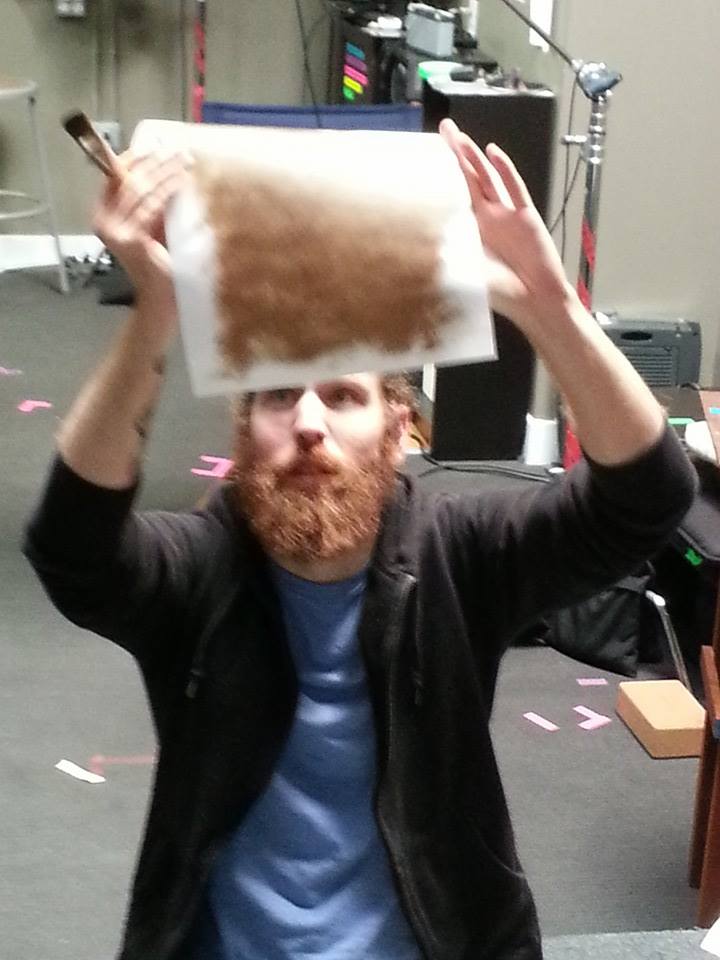
“Hold it up to the light to make sure you get total coverage. Really brush it around. If you’ve done this correctly, the paper will absorb some of the oil from the paint and give it a slightly dry feel. This makes it so the paint will only go where you tell it to go. It shouldn’t transfer to the panel from say, the pressure of your hand on the surface, for instance.

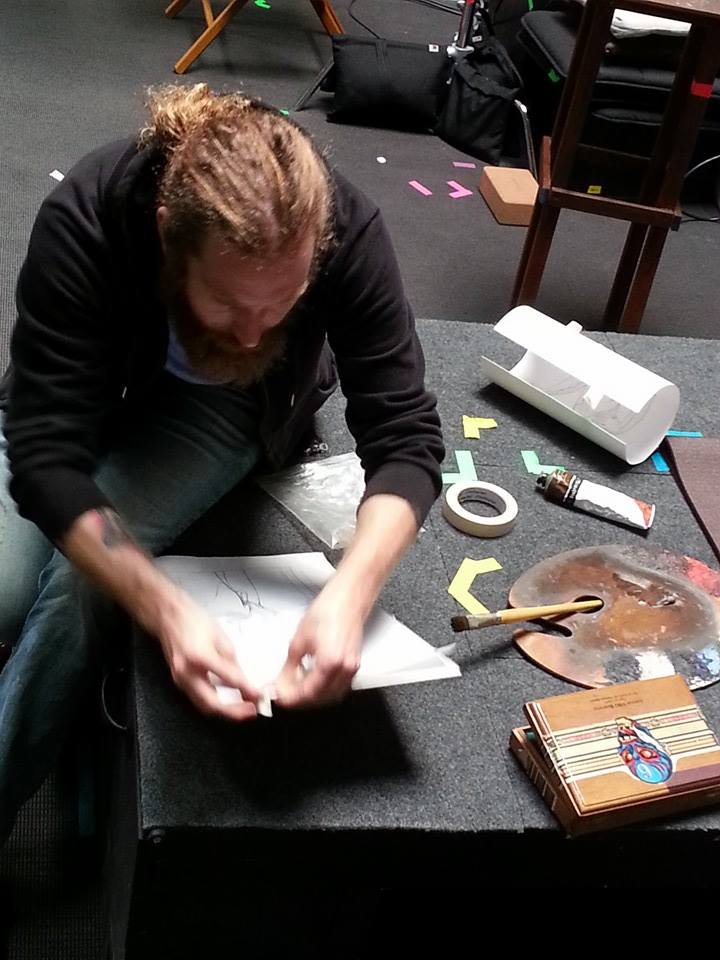
Now tape that paint covered photocopy to your support.

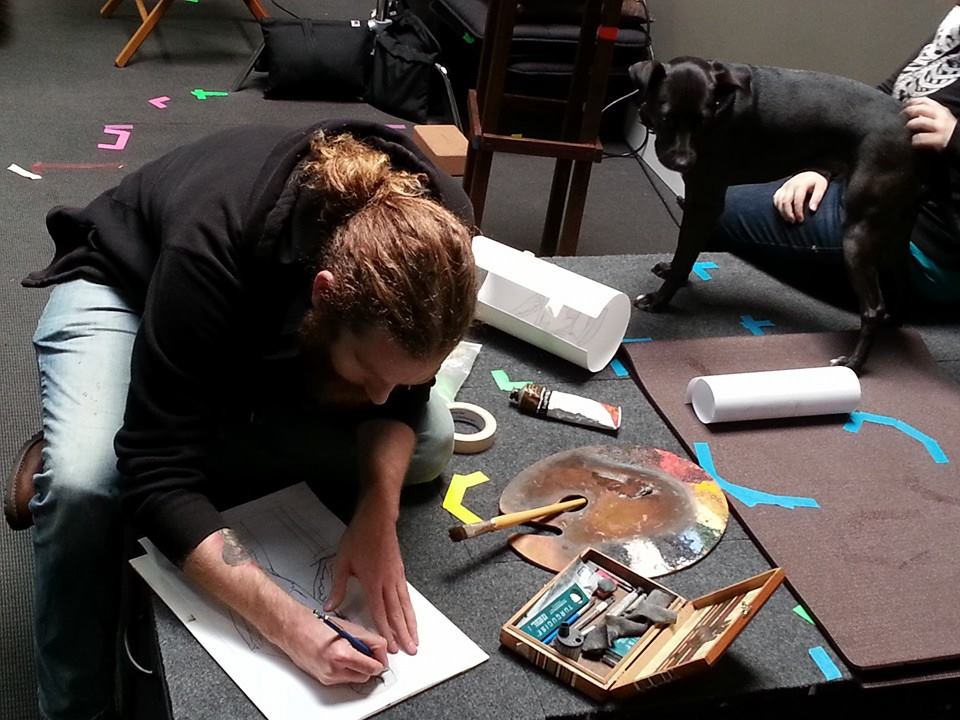
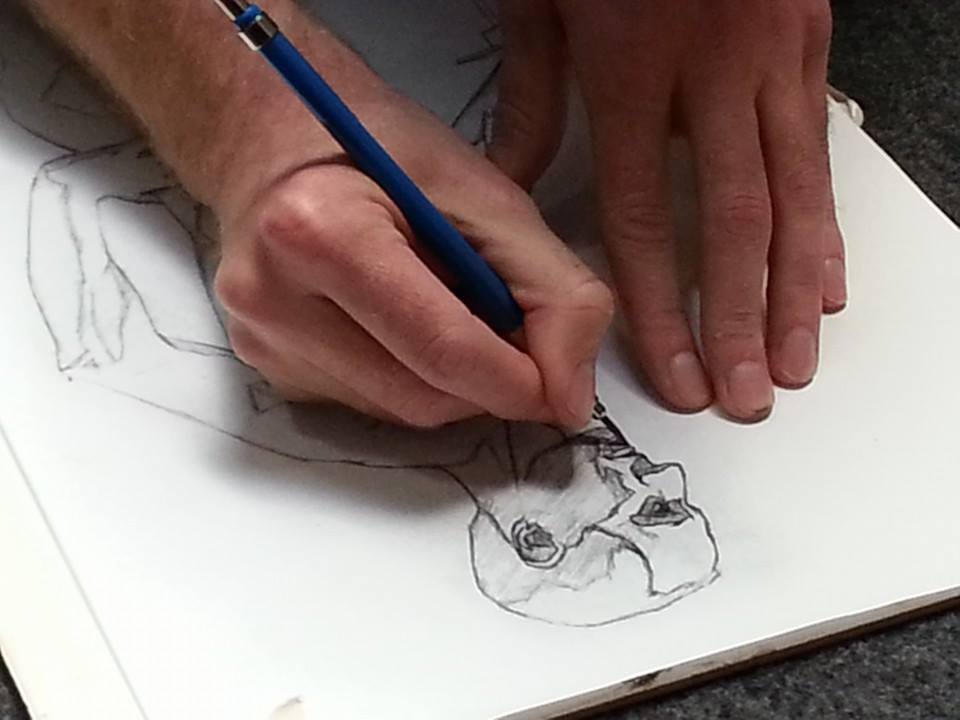
“Start tracing over your lines. Here I’m using just a regular H lead pencil, but it can be helpful to use something like a red pen so that you can tell what you’ve traced and what you haven’t. 

“Don’t press too hard or you run the risk of damaging your painting surface. Start lightly and try it out until you find just enough pressure to transfer the lines and no more.

“Routinely lift the drawing to make sure your lines are coming through okay. Just make sure you get it lined back up properly before continuing. Registration marks are your friend here.

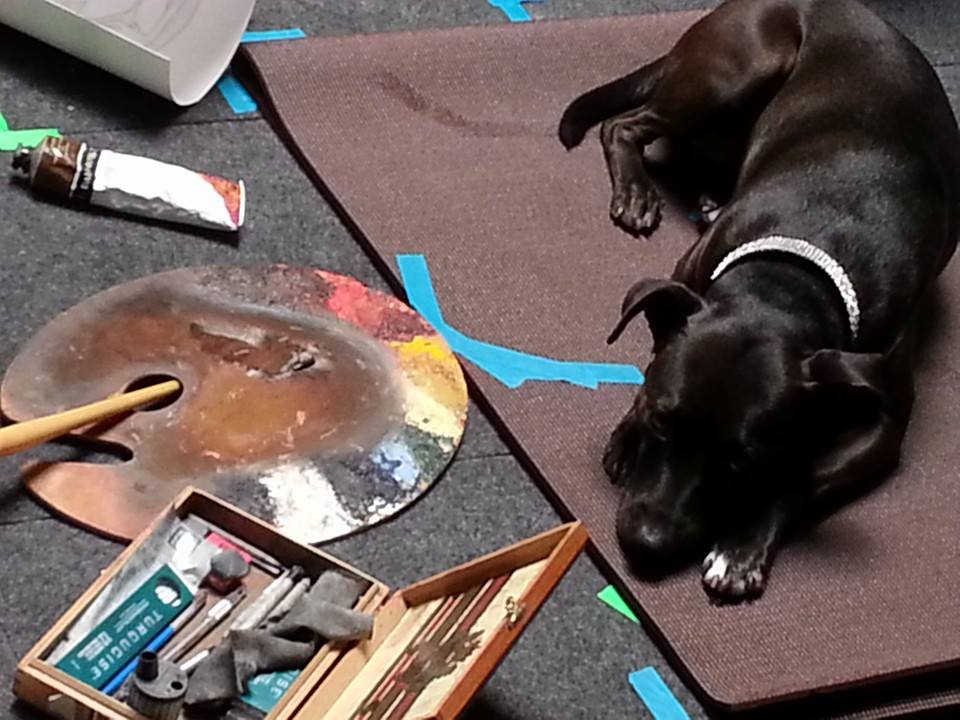
(Animal companions are a great addition to this process. Just don’t let them step on your palette!)

“All this should leave you with a nice clean drawing in thin paint on your surface. I use this technique to lay down lines for the majority of my studio paintings.”

Thanks for the demo, James! 


Saturday
Sep202014

New Painting Video: Painting the Value Sphere: Part One: Open Grisaille

Watch the Introduction to my latest Instructional Video! You click this link to buy the whole video now OR you can click here to join my online class here on Facebook. Online students get free access to the videos and get my comments and critique when you upload exercises done from my instructional videos.


>> Click here to learn more about my Still Life Painting and Drawing class at my San Francisco studio
http://www.sadievaleri.com/classes/sadie-valeri-still-life-drawing-and-painting.html 


Monday
Sep152014

Easels and Tabourets


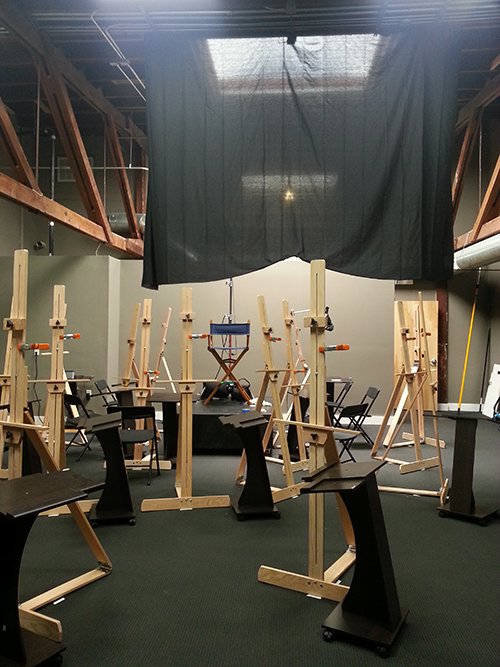
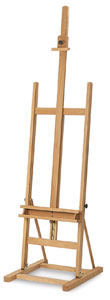
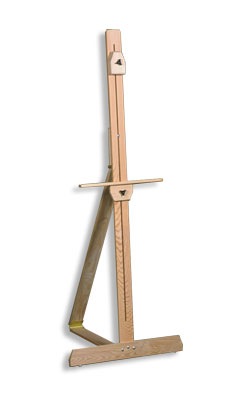
A lot of people ask about what easels I recommend. In our classroom studio we use two:

H-frame Winsor Newton Shannon Easel

It’s sturdy and well-made for the price. A hidden knob and pin make it non-intuitive for new students, but eventually they figure it out.


American Umatilla Easel 


Lightweight, affordable and very easy to use. We use pony clamps to secure the drawing board for more stability. 

The tabourets are actually laptop stands I bought from Overstock.com. They are a perfect height for holding pencils and palette next to you while you work.


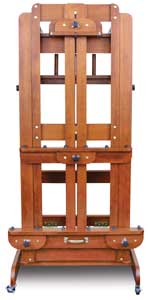
This is my personal studio easel, I love it:
Craftech Sienna Counterweight Easel


Monday
Sep082014

New Drawing Video: Straight Line Block-In Demo

I’ve just completed a new FREE video showing how I start a new drawing using Straight Line Block-In. My husband Nowell composed the soundtrack and did all the editing and production:


This is the exercise I give my students:

  1. Set up a brown paper bag, crumpled and twisted gently. Include a single egg. 
  2. Draw only STRAIGHT LINES and NO SHADING. 
  3. Work small, just 4-5 inches across per drawing, and put in mainly just the longest, most major lines and only a few secondary lines - just until it starts looking like the shape and gesture of the bag. Spend no more than 30 minutes on a drawing. 
  4. Turn the bag and move the egg to make a new composition and start another drawing. 
  5. I am working large with heavy, dark lines so the camera can record the drawing. You should work SMALL and with VERY LIGHT LINES

I teach a private Online Class on Facebook where I teach the fundamental principles of Classical Drawing and Indirect Painting:
Click Here to Learn More about my Online Class!
http://www.sadievaleri.com/videos/

See all our upcoming Classes and Workshops at my San Francisco Studio Here:
http://www.sadievaleri.com/classes/

Friday
Jul112014

Still Life and Cast Stands Setup and Lighting

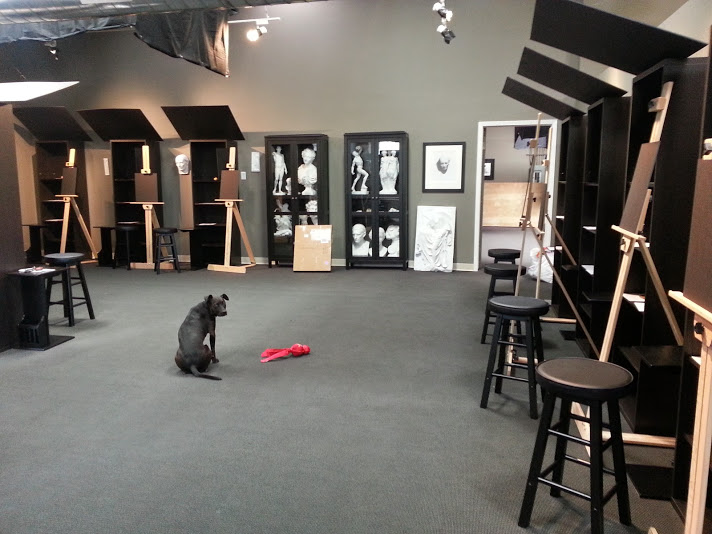
The new Cast and Still Life studio is all set up and my annual workshop is underway this week!

I’ve been working hard on getting great lighting on all the station and easels and I’m really happy with how they are turning out.

(Ripley prefers the studio to be full of her friends, she’s been a bit lonely this summer, she can’t wait to get her “pack” back together!)

The space really started coming together when we set up our furniture. For still life/cast stands I like to use black/brown Ikea shelving units. They are like shadow boxes, but with a bunch of extra shelves for storing materials. Students use the shelves to store their paintings supplies between classes.

Ikea Bookshelf
BESTÅ 
Shelf unit, black-brown 
Article Number: 401.021.29 

To start the lighting, I wanted a lot of white ambient light all over the room to light the easels well for painting and drawing. There are several skylights all over, and we added additional banks of fluorescent all over the ceiling, with the same daylight bulbs we discovered work great when we set up our last studio.

Philips 40-Watt 4 ft. T12 Natural Supreme 5000K Linear Fluorescent Light Bulb

Lithonia Lighting Industrial 6-Light High Bay Hanging Fixture

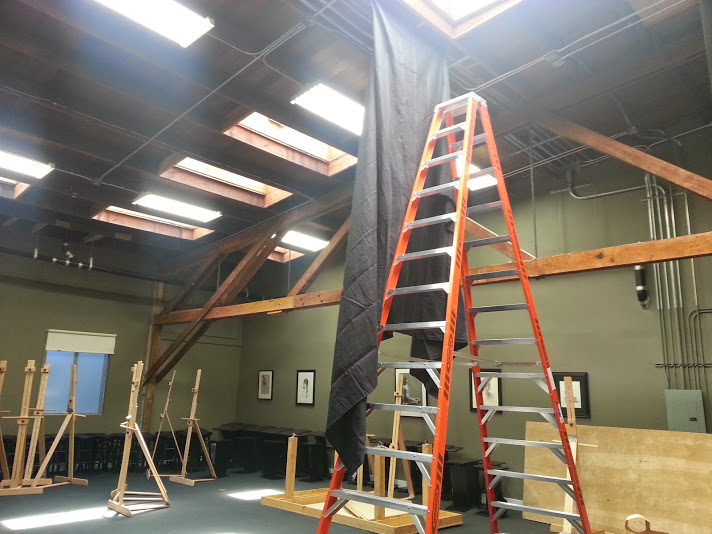
Then came the hard part: Baffling all that ambient light to create dark shadow boxes for the still life and cast setups. I want a single lightsource to shine on my subject, with very little ambient light. So I hung black photographer’s drapery from the ceiling (this is the baffling in the Figure Studio):

The hard part is the ceiling is 16 feet in some places. The easy part is that it is wood, so we can just staple up the fabric. This is the fabric I found - it’s not complete black-out, but it works well to stop light shining on your subject:

Prism Backdrops 10X20’ Black Muslin Photo Video Backdrop Background

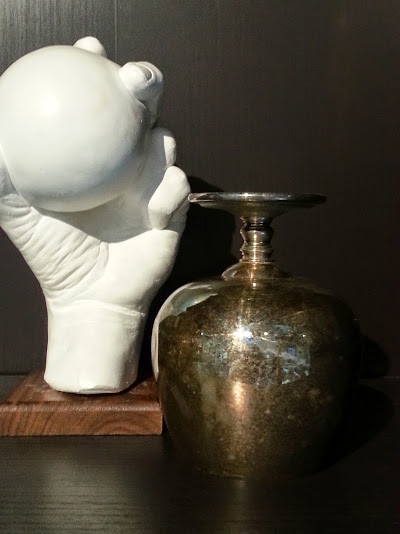
To light each individual cast stand we installed track lighting and pointed each light directly at one stand, from an angle. I set up a small cast and also an upturned silver goblet and put this setup on each stand, one by one, to test the light at each station. The white plaster cast shows me if the shadows are dark enough. The silver goblet is a clear reflection of every light source hitting it, which is really helpful to figure out where stray ambient light is coming from.

I get most my casts from
www.giustgallery.com

This cast is an inexpensive one I got at DickBlick.com

To control the light I created a “hood” for most the stations from a large piece of black foamcore attached to the top of the bookcase with a wire and strong Gaff tape. This blocks the skylight and fluorescent light but it is angled to allow the track light to shine on the subject.

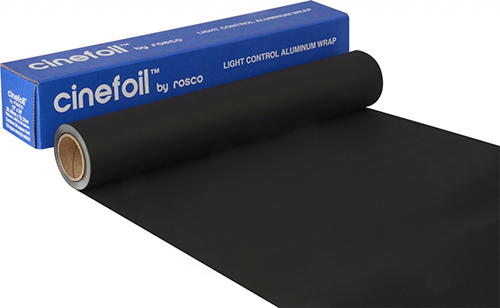
To control the light shining from the track light, we wrapped each light with Cinefoil, which is black “tin foil” used on film sets (one of the many lighting tips I have learned from my film-major husband, Nowell!).

I’m not posting the track light details because I’m not sure I like them yet. They are LED lights, which were an investment, but they will save us a lot on electricity bills. But we might end up swapping them out for stronger spotlights.

UPDATE:
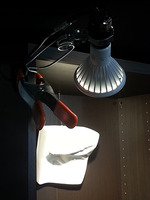
I ended up lighting most the stations with a clamp light (with the reflector hood removed) and a good LED bulb:
Feit PAR30 LED Reflector Bulb
 

I also used a pony clamp to make sure the light will not slip.
The light from these bulbs creates a tiny double-edge along the edge of a cast shadow, so I tape a piece of frosted mylar over the bulb. I also tape a piece of Cinefoil to mask off the light so it does not shine in my eyes.

Thursday
Jul032014

Varnish: Updated Method

I wrote about varnishing a while back in this post. Since then I have refined my methods and materials a bit so I decided to write an update (I’ve copied the relevant parts from the old post so you don’t have to go back and compare posts).

What is Varnish?
Varnish is the final clear finishing coat applied over a “dry” oil painting. Varnishing seals the surface of the painting, protecting it from dust and dirt build-up. It also restores an all-over sheen to the whole painting, deepening shadows and restoring colors that may have gone matte as the paint dried.

How “Dry” is Dry?
Traditionally, artists waited 6 months to a year before varnishing. And that’s for thin paint! Thick globs of oil paint may actually take many years to dry completely. However, if you are actively showing or selling your work, or working on commission, it is highly impractical to nearly impossible to wait that long to varnish. So, many artists varnish when the painting is “dry to the touch”. There is danger of cracking however, especially if the paint is thick and you are working on flexible canvas. I work with thin paint on wood panel, so I’m not so worried about cracking.

What Kind of Varnish?
Damar is the traditional varnish used by artists, made from tree resin. However, it is known to yellow with age, and it is also very brittle. Gamblin, manufacturer of paints and mediums, has a good varnish called GamVar but for smooth, very dark paintings I have found it is too shiny, and over-emphasizes brushstrokes. Many artists want their brush strokes emphasized, but I prefer a smooth surface, especially in a dark background.

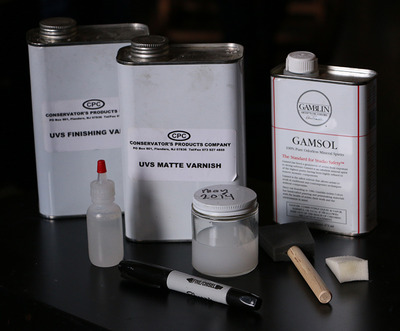
So now I use a varnish called Conservator’s Products UVS Finishing Varnish. It comes in a Regular (glossy) and Matte version, and I mix the two to get a satin finish. It has a slightly greater surface tension, so it seems to self-level and even out the surface.

Mix Up Your Varnish
To mix the proportions, I mark the side of a jar with a sharpie. I like 50/50 matte/glossy varnish, and I like to cut the whole thing with 50% turpentine, so I mark 4 equally-spaced marks on the side of the glass.

Shake the cans of varnish before you take the caps off, to make sure it’s mixed well in the can.

Fill your jar to the first mark with Matte varnish; then fill to the second mark with Glossy varnish; and then fill to the top mark with turpentine or mineral spirits (ignore the 3rd mark, it’s just there to help you get the spacing correct). I use odorless mineral spirits, but I just learned recently that you should use real turpentine for proper mixing, so I’ll be using real turp in the future.

You can use measuring spoons or shot glasses to mix up your varnish, but I find this makes more of a mess and gives you more vessels to clean afterward, so I like the pour-to-the-mark measuring method.

Finally, write the month and year on the lid with the sharpie. Varnish is not very stable, and occasionally I have applied “old” varnish and it simply won’t dry - stays tacky for days. So I mix up a fresh batch every couple months. The date on the lid tells me how old the mixture is.

Why Add Turp?
The reason I like 50/50 turp in my varnish is to make it the equivalent of “retouch varnish”. I feel this is easier to apply, makes a better surface, dries in a minute instead of 3 seconds so you have time to brush it a bit, and it is thin, so if I mess up I just add a second coat.

Add the STABLIZER
The varnish comes with very important STABLIZING drops, they recommend 5 drops per ounce. This is what makes the varnish dry, otherwise it stays wet, so remember to add the drops (personal experience speaking)! If you run out of drops or it dries out because you left the cap off, they will send you another little bottle for free. (Yep I did that, too). 

When you are done mixing the varnish screw the cap on and shake the jar well to mix it

You will need:

  • Varnish - Matte and Shiny versions
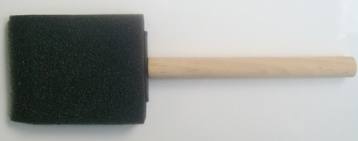
  • Sponge brush (Buy several, they are cheap)
  • Makeup sponge wedges (you can get them in drugstores near the makeup)
  • Windex
  • Small shallow dish (larger for a large painting)
  • Small soft paintbrush, like a #1 sable filbert
  • Low-lint cloth
    (There is no such thing as “lint-free” but do the best you can. I use floursack-style dishcloths, although I recently discovered soft auto-cloths, almost like baby diapers, which I am going to try next.) 

Lint is Your Enemy
Lint (and dust) will conspire to flock to your painting in massive unforeseen hoards. The largest airborne bits of debris you have ever seen will suddenly appear to hover above your freshly varnished painting in a great, slow mating dance. Your job is to keep lint off your painting, and off everything else that might come in contact with your painting.

Reduce Stress
Never varnish the same day you ship, frame, or deliver a painting! Give yourself a few days of extra time, both for the sake of the painting, and for your own sanity.

Windex
Squirt a makeup wedge with Windex and give the whole painting a quick wipe-down. The Windex will evaporate in a minute or two. This cleans dust and fingerprints off the surface of the painting, and the mild ammonia solution of Windex “bites” into the surface a little, so the varnish layer will adhere correctly.
Please note: Applying Windex to your painting is controversial, and some say you shouldn’t do it. I’ve made the choice to use it, because I have not been convinced it does any harm, and it is SO good at solving many problems I have with wet layers (oil paint OR varnish) adhereing to dry paint layers. I use it between every layer of my Indirect paintings, to help the layers adhere. Use at your own risk. 

Dry Thoroughly
Next, set your painting on an easel and shine a lamp on the painting for a couple minutes (don’t lie the painting down flat or it will just accumulate more dust). This will evaporate any moisture or windex left on the surface. If there is moisture on the surface, the varnish will “bloom” - a horrifying phenomenon, where you may think you have achieved a perfect varnish finish, only to find that within a few hours that the surface has developed a opaque white haze. Don’t let the painting get too hot, but it should warm a bit under the lamp.

Ready, Set…. VARNISH


When you ready to apply the varnish, use SPONGE brushes. They are cheap, they don’t leave any stray hairs behind, and best of all you can just throw them away when you are done. I keep a batch of fresh my new ones in a plastic ziplock bag, so they don’t gather dust before use.

Pour a very small amount of varnish into a clean, lint-free dish. It’s easier to dip the brush in a shallow dish, and also you won’t be contaminating your nice clean varnish jar with the inevitable dust or debris on your brush.

Dip the tip of the sponge brush in the varnish, and then brush on a thin coat over the painting, using long, horizontal strokes to cover the entire surface. 

If there are bubbles or streaks, sometimes I go over the whole surface again with a makeup wedge dipped it varnish, just to get a smooth surface. But work pretty fast, it starts to set up within a minute.

Waiter, There’s a Fly in my Soup!
What to do when you get lint in your varnish: Use the small #1 filbert to carefully “back brush” and lift the lint out with one swift flick, and wipe on low-lint cloth. If you don’t dig around too much, the varnish should “heal” and there should be no sign you messed with it.

The Inevitable Do-Over
At some point everyone has to re-do a varnish job. If you have lots of lint, or bloom, or if the surface was touched or damaged, you’ll have to remove the varnish. To remove, dip your clean lint-free cloth in odorless mineral spirits, and gently wipe (or even roll) the cloth on your painting. Be careful not to damage the painting, but keep in mind, it’s probably more resilient than you think. Dry paint film is pretty strong. Wipe until it seems like all the varnish is gone. If you are not sure, wait a few minutes for the OMS to evaporate, and then look for glossy areas. Start all over again, starting with removing any dust or lint.

Varnishing a Smooth Painting
My paintings have a pretty smooth surface, which adds another issue to varnishing: Beading up. Sometimes the varnish immediately beads up just like water on a new car. This is because the surface is so smooth that the varnish has nothing to “grab”. The Windex takes care of this problem completely!

Removing Dry Varnish
Varnish is made to be removable by anyone in the future cleaning or restoring your painting. It is designed to dissolve easily with odorless mineral spirits (OMS). It’s hard to imagine rubbing OMS or turps on your oil painting, but keep in mind, dry oil paint has a very strong film and won’t simply wipe away with gentle swipes of OMS. So the good news is, if you mess up your varnish, it’s easy to remove and re-apply.

Varnishing is tricky, and it’s always a good idea to practice on a small painting you don’t care much about before varnishing your masterpiece.

Saturday
Jun212014

The New Flexible Series: 8 Sessions, You Choose The Days

Student Cast Drawing by Franklin Lei, First Year, Full Time

I’m always brainstorming ways to make classical training as accessible as possible. For so long, art lovers and those who love to draw could not find the training we were looking for: Clear methods for improvement, supported by historical tradition, offered in progressive steps.

We would look at the “Old Masters” and we thought artists of the past were just “born with it” - the elusive ability to capture the visual world.

Student Painting by Dan Matthies, Second Year, Part TimeBut now we know: There are traditional methods of training that worked for 500 years, the same methods that propelled the artists of the past to the pinnacles of human achievement, and also educated society as a whole about the grand tradition of art.

I think these traditional techniques of careful observation and slow execution really are the best way for artists of all temperaments, at all stages of development, to see dramatic improvement in their abilities. I believe it because I see it every day in the development of my students. 

I want everyone to get a taste of the benefits of classical training. So I’ve decided to offer a more flexible way to study, so more of us can fit regular practice into our daily lives.

Master Drawing Copy, First Year Part Time StudentI’m now offering the ability to register for 8 Flexible Sessions in my Still Life and Cast classes. Flex classes are offered four days per week, and students can attend one or all per week, the same days or different days each week, for a total of 8 classes within two months.

Beginners and those new to my studio get an accessible introduction to the basics.

Current and returning students are also welcome to take advantage of this more flexible format.

Schedule:
Tuesdays, Thursdays: 1:30-4:30pm

Saturdays, Sundays: 10am-1pm


My new Flex Series starts this fall, students can choose their days and months at the link:

 Click here for more information about our curriculum and to register

This is an incredibly exciting time and I’m grateful to live in an era in which we can all benefit from the resurgence of Classical Realist training, I hope you can join us!


Tuesday
Jun102014

New Studio Warming Open House Party July 6, 2014

I am thrilled to announce that after a long search we have recently leased an additional, larger studio space! The new location is just 1 mile from our current location.

Please join us for a Studio Warming Open House Party to check out the new space and enjoy some refreshments on Sunday July 6, 2pm-6pm!

1045 17th Street, San Francisco, California

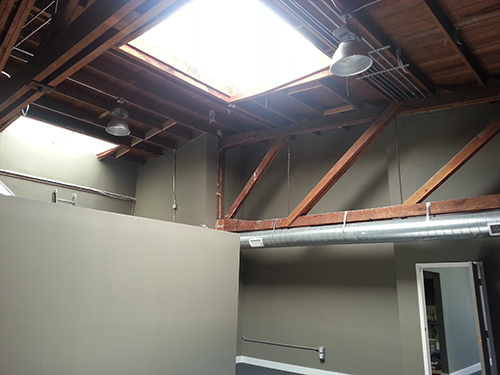
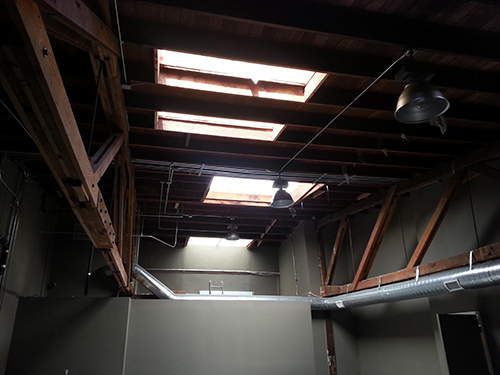
The Figure Studio has an enormous frosted skylight right over the model stand

The walls have just been painted (Benjamin Moore, Sparrow AF-720) and we are currently building out a kitchen/lounge area, as well as installing keypad-keyfob door access, plus shades for the skylights. We are still keeping the current Bryant Street location as well.

Skylights and beautiful original beams in the Figure studio

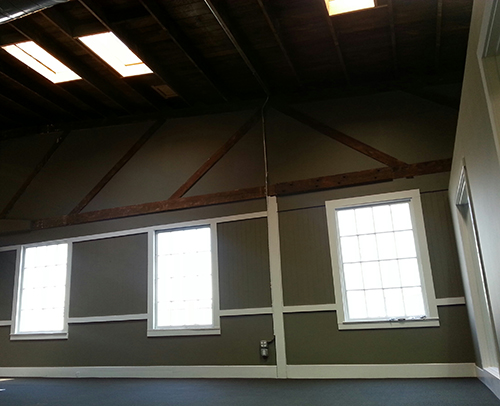
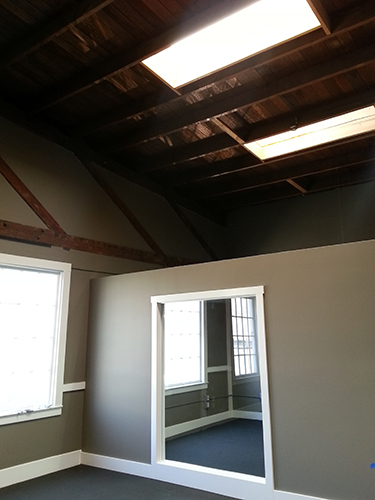
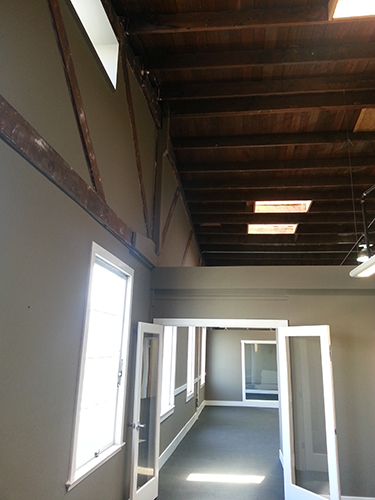
The new space is over 3200 square feet (our Bryant Street studio is 1800 square feet). It has high ceilings, north light windows and skylights throughout, plus beautiful dark wood ceiling beams. Best of all, we will have a Figure studio in a completely separate room from the Still Life and Cast studios, so we can run classes concurrently and we won’t have to rearrange the space daily as we do now.

Wall of North Light windows in the Cast and Still Life studio
Location
The new space is just a mile east from our current space, at 17th and Pennsylvania Ave, in the Mission Bay neighborhood.
The address is 1045 17th Street, cross street Mississippi.

Still Life and Cast Drawing studios are subdivided so everyone has plenty of wall space for mounting casts and setting up still lifesMove Date
We will be setting up the new space over the summer and classes will begin classes at the new space in August and September. Most summer workshops will still take place at Bryant street, but my workshop, Daniel Keys, Katie Whipple, and Felicia Forte’s workshops will be at the new studio.

Parking and Transportation
There is available street parking in the immediate blocks around the studio which is free all day. So far we have always been able to find a spot within a block of the studio, even at peak business hours. There is also plenty of free 2-hour Residential street parking within a couple blocks of the studio.
Public transportation: The studio is accessible by the Caltrain commuter rail, the 3rd Street Muni light rail, and the #22 bus


Entrance to one of the Still Life and Cast Drawing studios

NEW Extended Hours!

Still Life and Cast students now have access to the studio from 9am to 5pm on their designated studio days, so students can come in and work on ongoing projects in addition to the regular instructed hours.


Wednesday
Apr302014

New Monthly Enrollment Option

Teaching at my own Atelier leads me to think about art education a lot. I am constantly refining my classes and programs, and these are some of the questions I mull over:

What is the environment and schedule that works best for learning? Is it most useful to have students work through a logical sequence of skill building, or should they try projects beyond their current ability? When do students need help and encouragement, and when should they be left alone to work on their own? Should art school be an insulated, protected time of study, or should it prepare students for life as an artist, which is not at all insulated or protected? Should a teacher offer the program they wish they’d had, or should they honor the instincts of each student on their own path? What is the most efficient way to build skills? And: Is “efficiency” even a valid goal for art or the study of art?

I don’t think there are right or wrong answers to any of these questions, and most my answers are somewhere in the middle of these extremes. I would even answer some differently depending on the student, depending on their goals and learning style.

My goal for art education is to foster an environment that helps artists develop their skills, builds their confidence, and also kindles and nurtures their inspiration. Because to be an artist you need to develop the emotional fortitude to continue no matter what (because continuing is the hardest part!), and you also need to practice the regular habit of tapping into what moves you, to find that original source that compelled you to want to be an artist in the first place.

From my perspective, an art school should foster all three equally: Skills, Confidence, and Inspiration.

With this goal in mind I have recently re-oriented most my programs and classes under the idea of Monthly Enrollment. Students who enroll have access to all the resources the Atelier can provide: A beautiful, well-lit space to work, instructors for guidance, a curriculum to organize time and progress, and inspiring subjects for study including a large, quality cast collection and a selective roster of the best models available.

I’ve set it up so students can set their own schedule and work at their own pace so they can benefit from a high quality program with plenty of instruction and an ordered curriculum, but also with flexibility to accommodate each student’s’ particular goals:

Some artists want to continue their weekly studies indefinitely, for the benefit of ongoing scheduled practice time incorporated into their busy lives, and others want to work intensively for a few years, exclusively focused on their art studies, and then move on to become professional artists. Still others just want try out a new technique or brush up on something they have not done in a while, or just try out the Atelier and see what it is like, so we still offer short-term classes.

I’m really excited about this new way of making traditional, realistic art education available to everyone who is interested in it. I feel it’s the best way I can offer an extremely high quality education, based on everything I have learned that worked well for me and also works best for my students, but in a way each student can take advantage of according to their own goals for their artistic development.

Click here for more information about Monthly Enrollment:

http://www.sadievaleri.com/classes/monthly-enrollment.html


Saturday
Feb082014

The Cast Collection

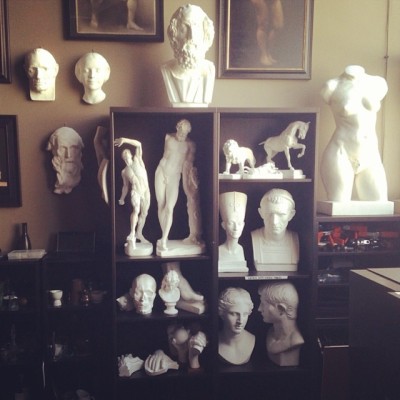
We’ve had fun unpacking boxes and boxes of new plaster cast reproductions! Casts of great sculptures are the backbone of any classical atelier. By copying the work of the Ancients, students develop a highly sensitive understanding of proportion and value.

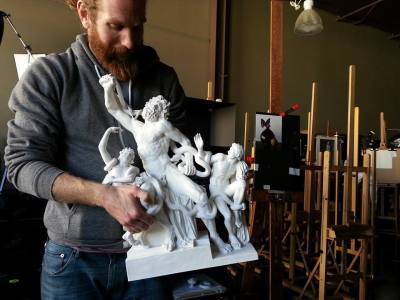
Instructor James Edmonds unpacks our Laocoön

By the way, Laocoön is pronounced with FOUR syllables, like this!

Just part of the cast collection at Sadie Valeri AtelierThe Full Time Program at Sadie Valeri Atelier is now accepting applications. The deadline for applications to start your studies in Fall 2014 is March 28. More information about the program and how to apply is here.

Saturday
Feb082014

New Logo!


We have a new logo! What do you think? Would you want this on a hoodie?? 

Saturday
Feb082014

TRAC 2014: The Representational Art Conference


My Atelier is an official sponsor of TRAC The Representational Art Conference held March 2-5 in Ventura, California. We will have a table display with information about our classes and workshops, and my instructional painting video “Indirect Painting” video will be for sale.

Last year’s conference was amazing, generating lots of dialogue about the present state and future of representational art. I’m particularly excited to hear classical painter and atelier director Juliette Aristides deliver one of the keynote addresses.

Sadie Valeri Atelier instructors Felicia Forte and James Edmonds will also be attending. We are looking forward to hearing some great presentations and participating in sure-to-be lively discussions!

For more information and to register visit: http://www.trac2014.org/

Friday
Dec062013

Removing Lint from an Oil Painting

UPDATED 12/2017

I no longer recommend using Windex for cleaning the surface of an oil painting.
 
I’ve found that just gently wiping odorless mineral spirits on the surface with a makeup sponge, then rubbing with my palm or finger usually can “roll” the lint particles out of the surface. Then I wipe down with the makeup sponge to get rid of the debris, and then oil out the area I plan to paint over that day.
For best results do it on every dry layer throughout the whole painting process. Don’t paint over the dry linty surface with new wet paint. 
Deeply embedded lint might need more aggressive sanding. If you need to sand down the surface, use 600-1500 grit wet/dry sandpaper, oil the surface with straight linseed oil or your medium, and start gently in a small area with just a fingertip wrapped in a small scarp of sandpaper. This will take up a lot of paint though and the area will require re-painting.
If you want more help feel free to join my online class, tons of resources there and I answer questions and give feedback if you work through my lessons in order:
www.sadievaleriatelier.net

Sunday
Oct272013

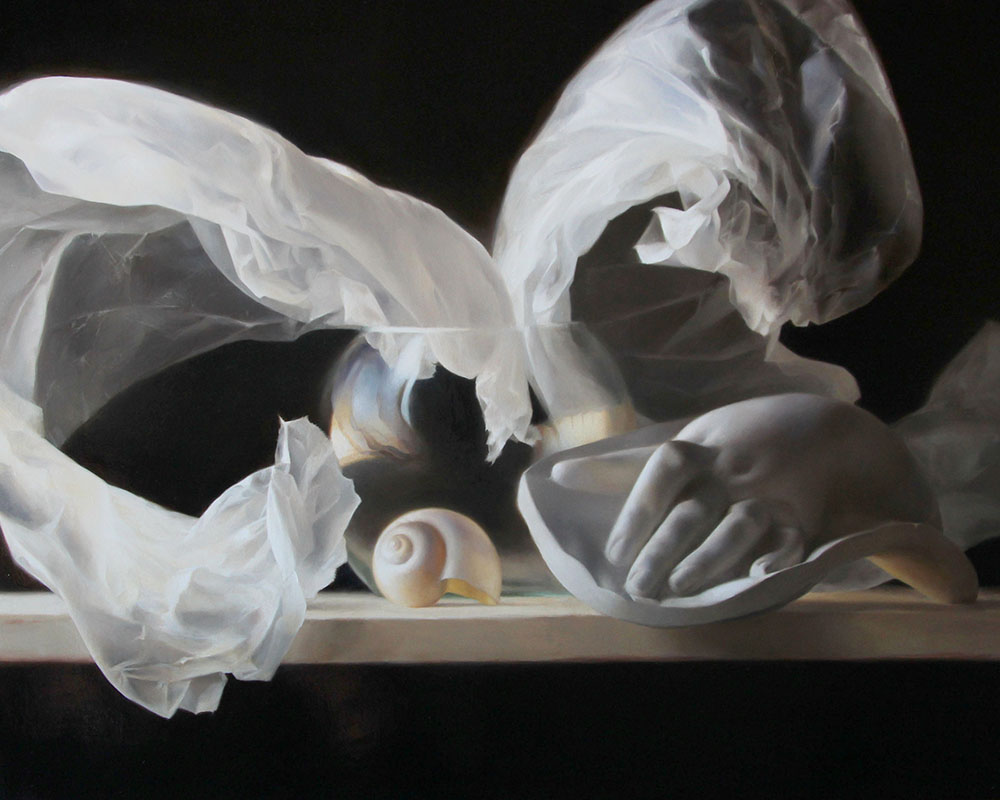
The Life of a Painting: "Between Darkness and Wonder"

“Between Darkness and Wonder” 16 x 20 inches, oil on panel

I’ve just completed my latest painting, “Between Darkness and Wonder.” I started it last April, but had to stop working on it for most the summer for reasons I’ll explain soon. In total I estimate I worked on it for about 10-12 weeks.

It was a luxury to work on it so long! I love not having to rush. For about a year now I have resisted committing to gallery shows for yet-unpainted work, because the pressure to make show deadlines was starting to put too much stress on the process of making my paintings. So now I have no show commitments, and I can take as long as I like on each painting.

I started the painting back in April with a detailed line drawing:
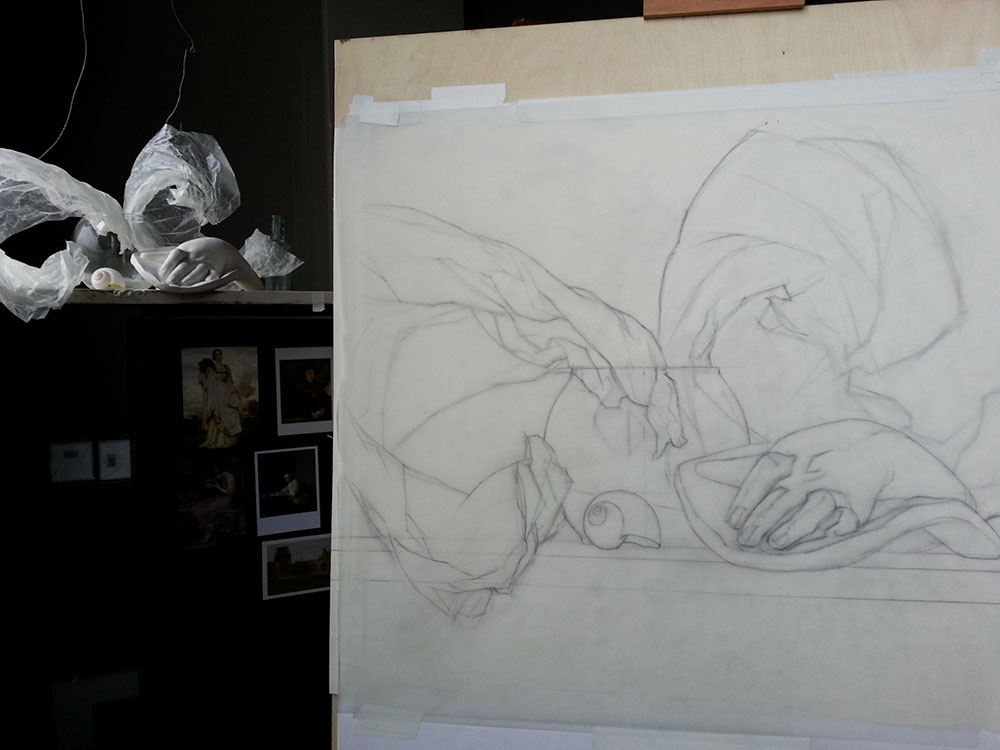
Preparatory line drawing, graphite on vellum trace paper

After I transferred the drawing to the panel and refined it, I started a layer of umber monochrome underpainting. 
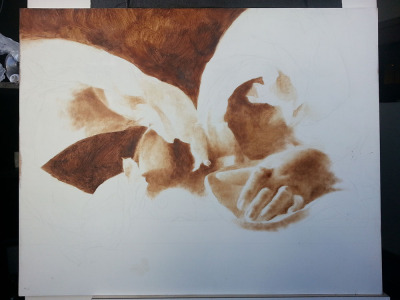
Open grisaille underpainting, Burnt umber only

In this area you can see the umber “open grisaille” transparent underpainting, with the next layer started on top: the closed grisaille opaque underpainting.


Starting the Closed Grisaille

This stage is after a pass or two of color. The values and colors are still rough, and I’ve left the edges soft and blurry so I can continue to refine the drawing.
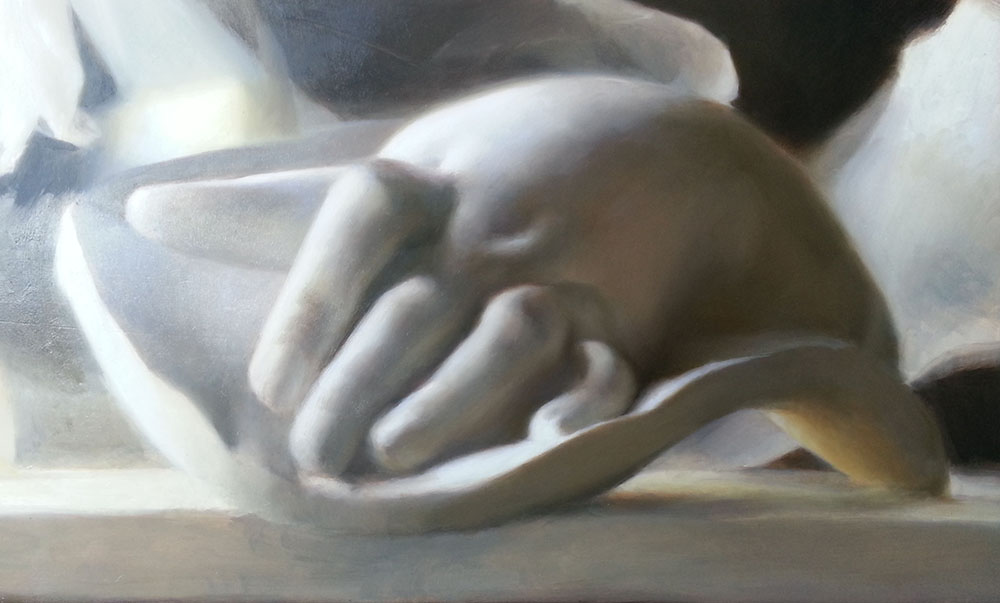
Rough color

When the whole painting had a pass of color, I had spent 6 (somewhat distracted) weeks on it, and I was about 50% done.

At this point, my life got even more crazy and I had to put the painting on hold over much of the summer.

For one, I had agreed throughout the previous year to write a few different articles for various publications. It just so happened that the final deadlines for all the articles converged at the same time, in late June/early July.

One article was for The Artist’s Magazine, and it was a Drawing Board column about how I use the principles of light falling on an imaginary sphere to render light and shadow.

The images for the article are simply the stages of my Graphite Value Sphere exercise, so the magazine editor requested a more dynamic image to illustrate the concept. I decided to do a drawing of the hand cast in my still life, since it was already set up and because I wanted to study the shapes of the forms in more detail before moving forward with the painting anyway.
Study of a hand sculpture, 8 x 10 inches, graphite on transluscent vellum
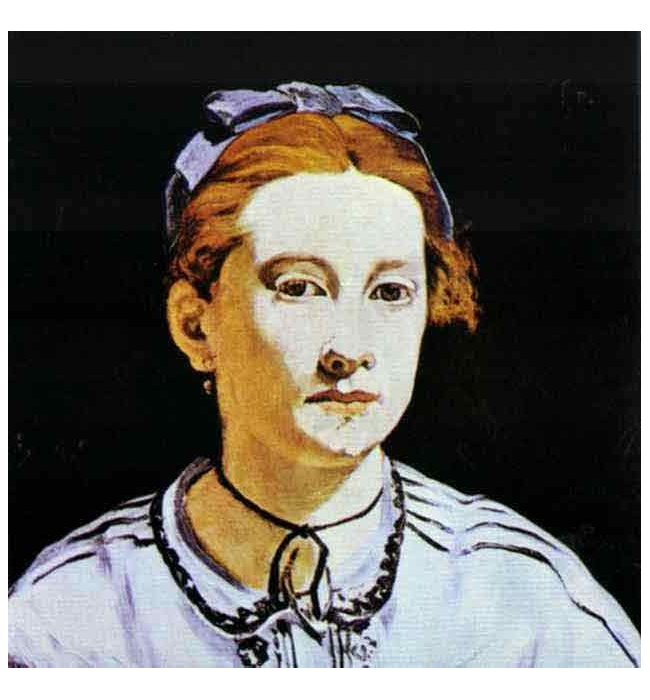
Victorine Meurent portrait by ManetThe next article I wrote was about Victorine Meurent, the model who posed for Manet’s “Olympia,” who was also an artist who showed her paintings in the Paris Salon.

I was fascinated by her life as a working-class music hall performer who became one of the most iconic models in history, and amazingly was also an artist in her own right.

Little is known about her and only 1 of her own paintings has survived, but she studied at the Academie Julian (one of the first fine art schools open to women), lived into her 80’s and indentified herself as an artist her whole life. The article is published in The Portrait Society’s quarterly printed newsletter.

The third article was a step-by-step of my painting process featured in International Artist Magazine. In it I describe all the stages of my painting, Anchor in the Gale, which is the same painting featured in my instructional painting video “Indirect Oil Painting.”

Step-by-step of “Anchor in the Gale”

Meanwhile, another big event was happening at the studio. We had been hosting Carl Dobsky along with his full time students in our space after Safehouse Atelier lost their studio back in February. But Carl’s girlfriend lives in LA, and over the summer he made the difficult decision to stop teaching his full time program, and move to LA to be with his girlfriend.
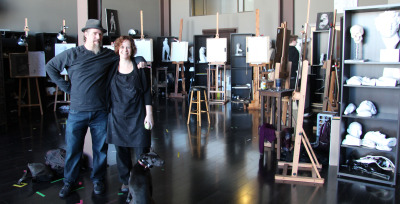
Me and Carl in my studio right after he moved his students in

Carl is a good friend of mine, and I understood and supported his decision. I knew it was a wrenching choice to leave his students and the school he had spent years building.

His departure meant major changes for the studio, so I had some hard thinking to do. I considered disbanding the full time program, but the students were all set up and working on their cast drawings. I really enjoyed the focus and energy of having a full time program in my space. Carl had assembled a wonderful group of students, and I knew they would be disappointed to stop their studies.

I had not intended to direct a full time program so soon, it was always a distant idea. But the final decision was made easier when Carl highly recommended his former student, James Edmonds, to help teach.

I already knew James since he had been subbing for Carl’s classes occasionally while Carl worked to finish paintings for his September solo show at John Pence Gallery. James was enthusiastic about teaching the full time program, and when I offered him a position at the studio he accepted it. One of Carl’s full time students, Christina Davis, had already begun assisting me at my summer workshop, and she agreed to be my ongoing assistant for all my classes at the same time she is continuing her studies. So by hiring both of them I could continue the program.

Taking on the full time students meant I had to restructure my weekday teaching program, incorporating both part time students and full time students into all my classes. It significantly expanded the resources I can offer to all my students, but it required a lot of financial calculations, space calculations, and the procurement of more studio equipment. So I spent most of the summer planning and preparing for the fall semster, when I would start my program after our summer workshops.
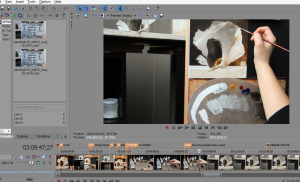
Screenshot of Nowell’s editing software for my instructional videoFinally, on top of all of that, Nowell was at home working long hours every day for months to complete the editing and production of my 3-hour instructional painting video.

As with all major projects, it turned out to be even bigger than we had originally estimated, and we both felt the pressure to get it done as soon as possible.

Nowell generally handles all the “behind the scenes” of running the studio: Keeping us stocked up with supplies, running payroll and bookkeeping, combating the never-ending beurocracies of small business, and running our home life. He managed to keep with all that while producing the video, but he was overworked for months.

So, it turned out to be a pretty busy summer!

Finally, in September my fall classes began again, the full time program (including 5 of Carl’s former students and 3 brand new students) started their school year. James and Christina came on board as employees, and very soon we were settled into a daily routine.

With all the studio’s classes, including our evening and weekend classes, we now have 125 students and 4 instructors working in the studio every week. With this amount of activity, just keeping the space functional, the instructor’s needs met, and the students productive, requires significant organization. I could easily spend all day every day just teaching and running the studio, and never have time to paint.

But I work hard to stay organized so I can preserve my daily painting hours. Once the summer was over and the new schedule of classes were up and running, I could get back to painting my usual hours: 6 hours at the easel a day, 6-7 days per week.

Finally, I was back to my painting - and then the fun part began!

With the drawing and values complete, and the color roughed in, I could focus on the details of subtle light and texture, further refining the hues and values. Every layer gets closer and closer to what I envisioned when I first started the painting.
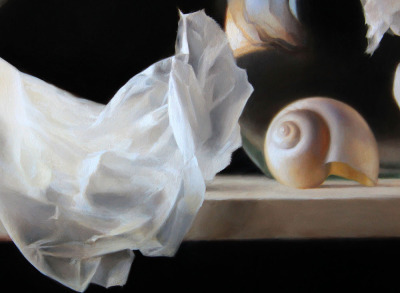

DETAIL of “Between Darkness and Wonder”

DETAIL of “Between Darkness and Wonder”
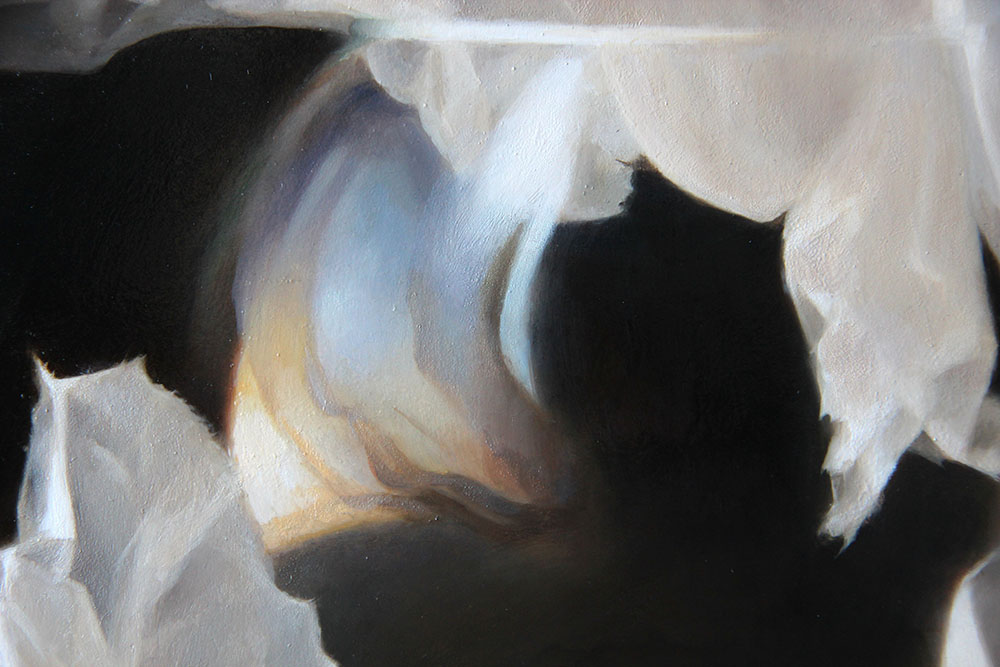
The 6-month period of painting this piece has essentially encompassed a tour of my entire art life: Teaching, managing the atelier, writing articles for art publications, and working with Nowell on the videos.
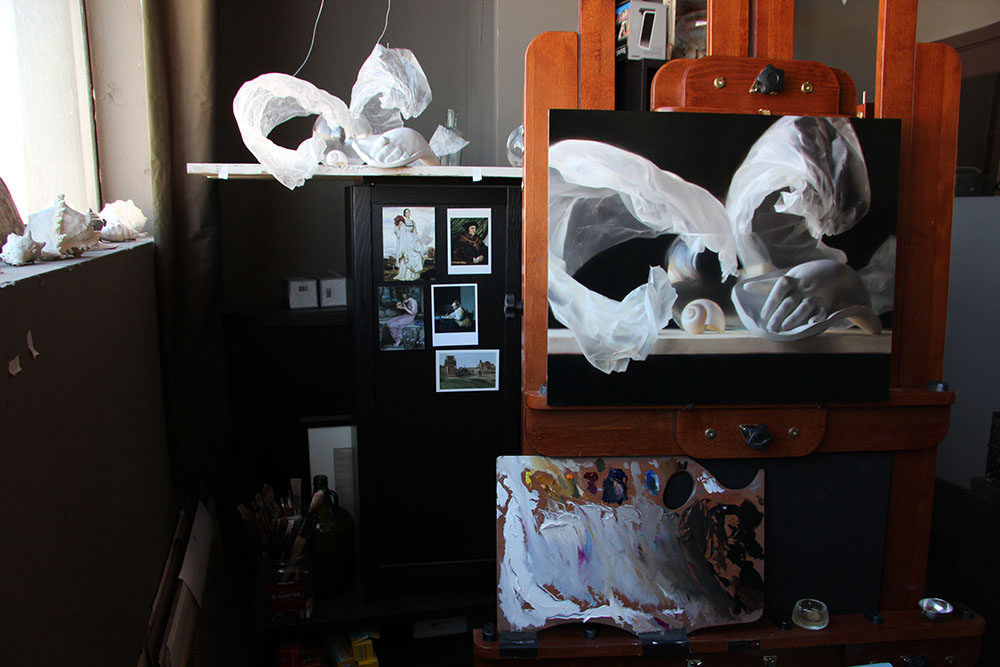
Now that everyone is settled into a routine, and the instructional video has been released, Nowell and I are looking forward to a period of focused creative productivity for both of us.

And perhaps an occasional day off.

“Between Darkness and Wonder” 16 x 20 inches, oil on panel

More information about our Full Time Atelier, Part Time Atelier, weekend and evening classes, and intensive Workshops, is on our Classes page.


Monday
Oct212013

The Life-Changing Workshop


Long time readers of my blog know that I consider workshops to be the backbone of my Realist education. 


I was not able to attend a full-time atelier like I dreamed of doing, but I planned my workshops carefully, and I worked hard in every class: I picked the instructor’s mind as much as they would let me, and I practiced exactly what I’d learned back at my home studio. I worked hard, and saw real improvement in a relatively short time.

In my experience, even just 5-10 days with a gifted instructor can literally be life-changing. It happened to me, several times.

That’s why I offer Workshops and Part-Time Classes at my Atelier, in addition to our Full Time Program. Not everyone is in a place in their life where they can study full time, but if you are VERY thirsty for knowledge it’s possible to achieve a high level of skill and ability even without attending a full-time atelier.

Click to see our incredible lineup of the finest workshop teachers scheduled for 2014

I’m excited to see our students experience these life-changing intensives!